2D
Sprites A 2D project uses Sprites to create its visuals. These potentially contain different Texture assets and may thus require many draw calls if not batching properly. To optimize resources, use a Sprite Atlas (Asset > Create > Sprite Atlas) which will allow batching sprites using the same material and packed texture.
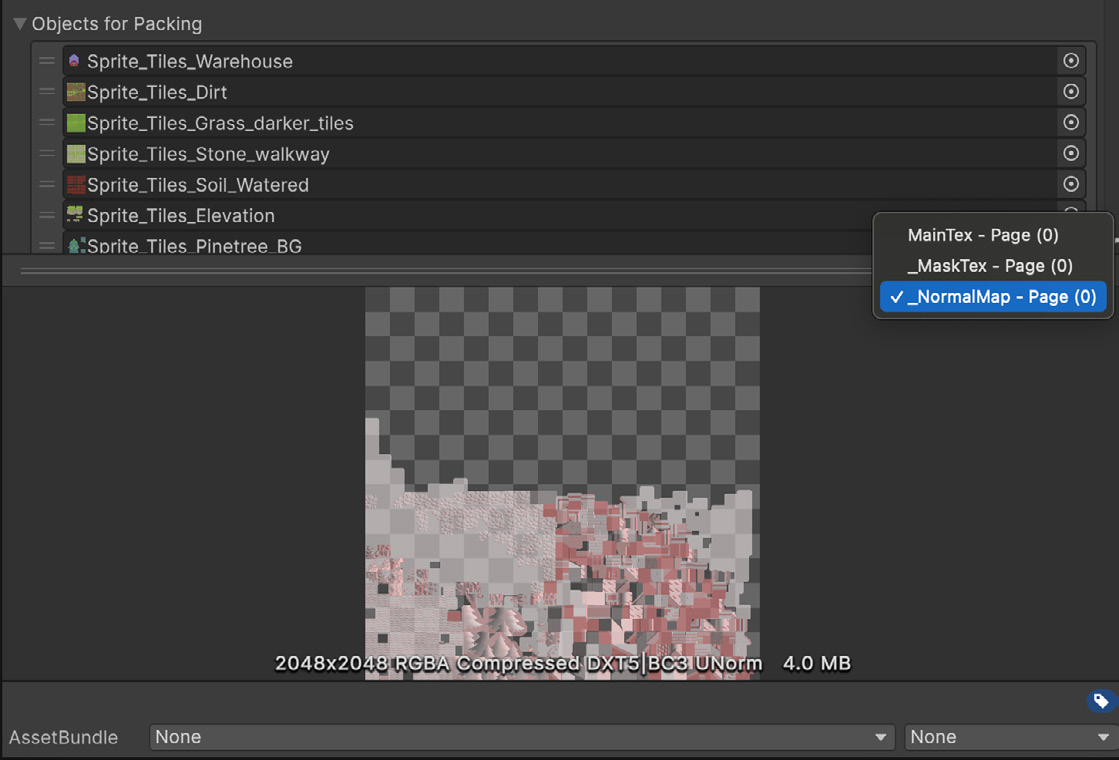
Avoid duplicated assets when packing sprites In 2D URP, sprites can contain normal maps or mask maps which you might also want to pack in a Sprite Atlas. This is important for performance and quality reasons, such as memory optimization, draw call reduction, and loading efficiency. If you add folders to the Sprite Atlas, make sure they only contain the normal sprite or albedo texture. Normal maps and mask maps will automatically be added to their respective atlases that you can view in the drop-down list. Otherwise, they would be added unnecessarily to the normal pack atlas, taking up space in it. Having neatly organized atlases for normal maps or mask maps allow you to fine-tune compression settings for each one. For example, normal maps can be half of the resolution, while the normal sprites can be in full resolution, or any other adjusting that you need based on the platform you’re developing for.
The three types of atlases when packing 2D sprites
Structure your folders to maintain consistency Folder structure within 2D sprites makes it easier to locate and manage assets, helps manage memory by organizing assets by load time, provides a clear separation of different game elements, and more. Here’s a common folder structure to help organize the folders your Unity project: —
Sprites/Characters/[CharacterName]/Animations
Sprites/UI/[MenuType]/Elements
Sprites/Environment/[LevelName]/Background
Sprites/Effects/[EffectType]
Sprites/Common/SharedElements
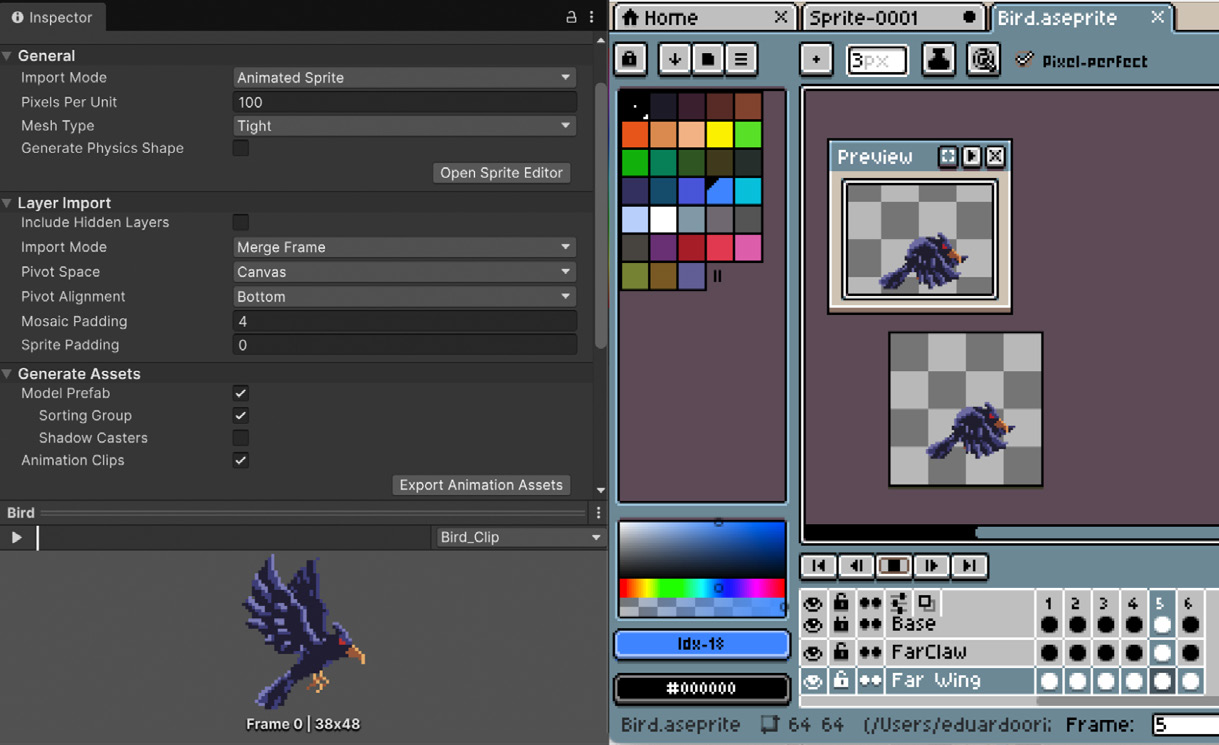
Bring your pixel art directly to Unity with Aseprite Importer Aseprite, a sprite editor and pixel art tool, has become an industry-standard DCC app for pixel artists. With Unity Aseprite Importer, you don’t have to export hundreds of .PNG sprites individually; you can add your .aseprite file directly to your project.
Work directly in Aseprite, click Save, and instantly see the changes in Unity. The Importer includes drag and drop support for .aseprite files, automatic setup of GameObjects and Animation clips so they’re ready to use, and a comprehensive 2D feature set integration. In Unity 6, we enabled auto-generation of Tilemap assets from .aseprite files containing tilemaps. Changes to the source propagate down automatically.
The Aseprite Importer in the Unity Project window: This section of the Unite 2024 talk Say hello to new 2D workflows and AI enhancements demonstrates the Aseprite Importer in action
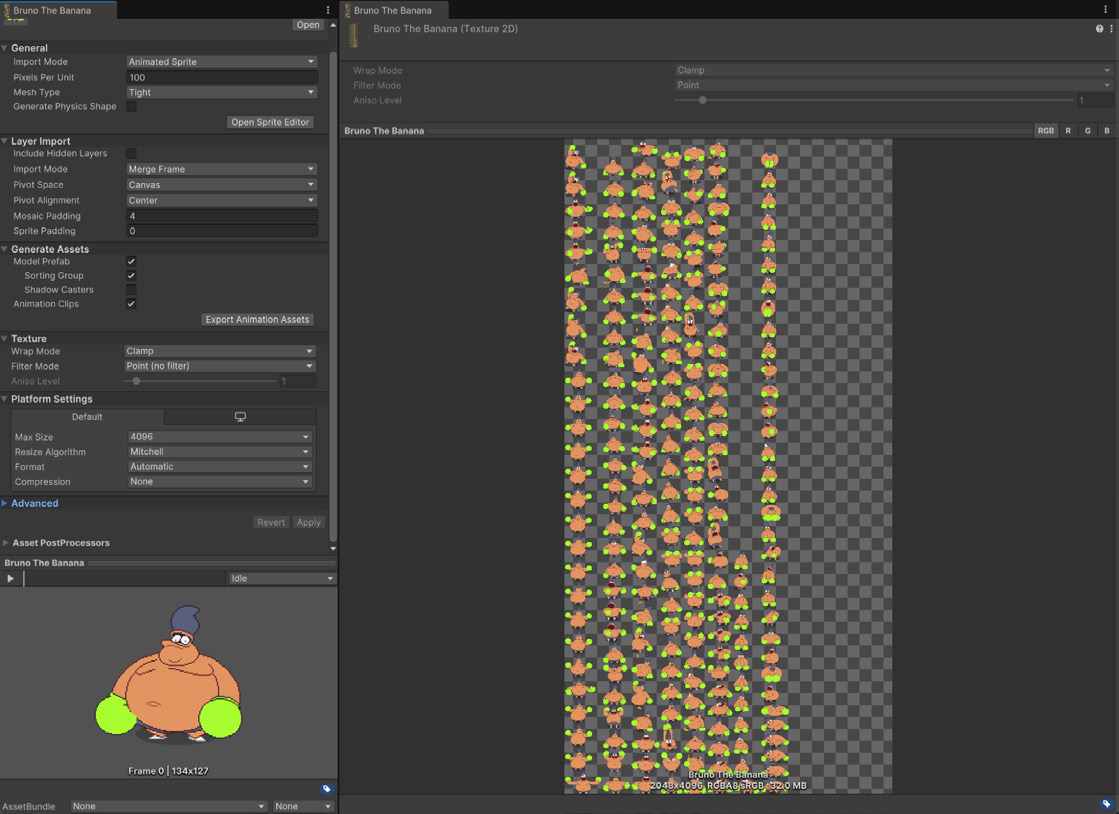
Bring your frame-by-frame animations from Aseprite to Unity One of the most helpful tips for using the Aseprite Importer in Unity is to keep your Aseprite files well-organized with Tags and Slices before importing, as these features allow smooth and automatic handling of animations and sprite slicing directly in the Editor. For example, use tags such as “Idle”, “Walk”, etc., to define and organize animations, and use Slices by marking specific areas of your sprite or separate parts, such as head, weapon, etc. This can help with streamlining the importing process and save you time.
An imported animation into Unity from Aseprite
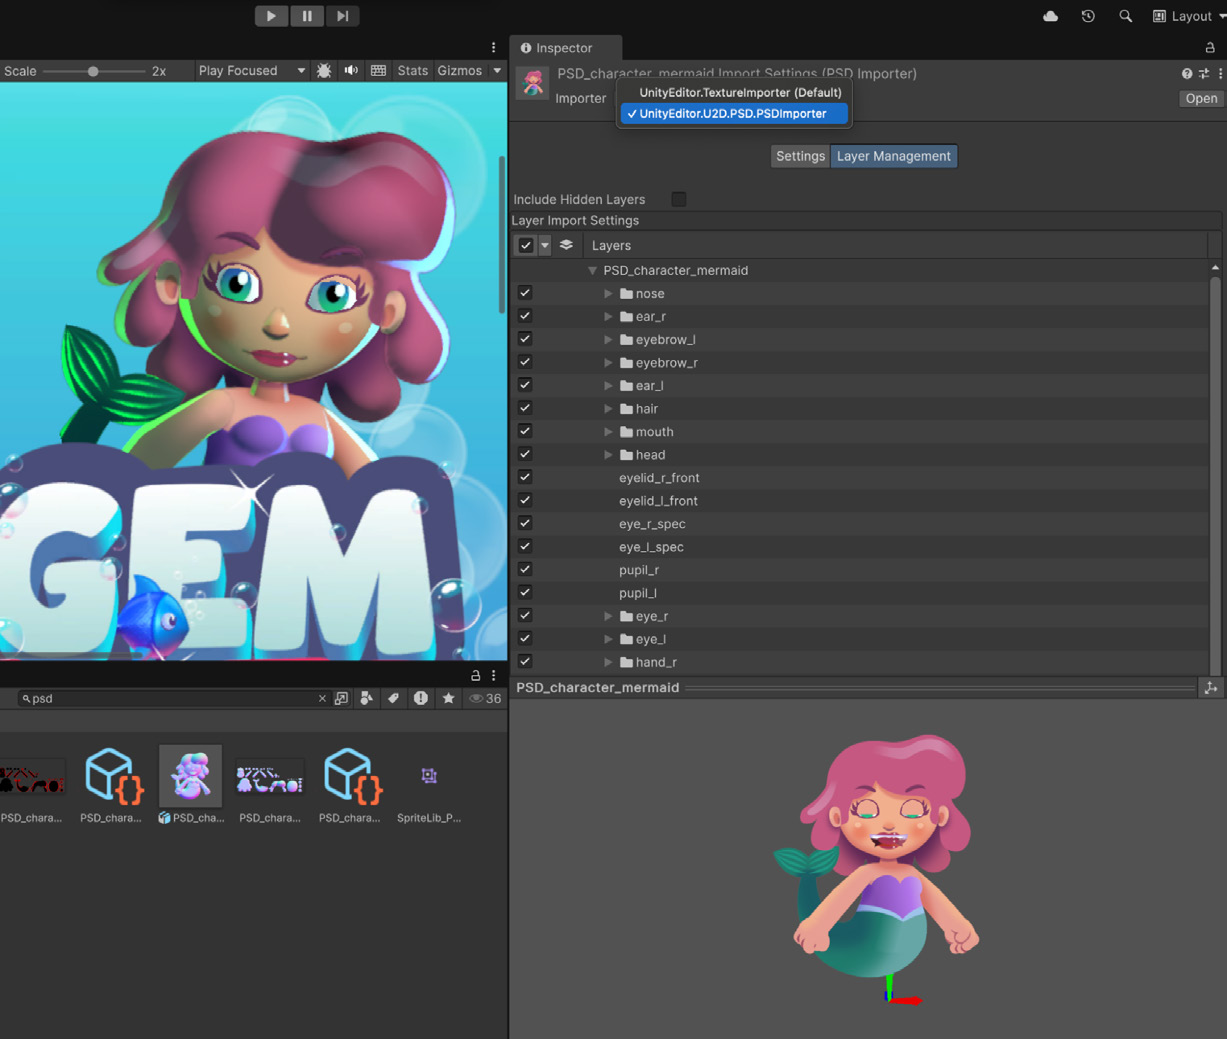
Speed up the roundtrip import process with the PSD Importer The PSD Importer imports Adobe Photoshop files into Unity and generates a prefab of sprites based on the imported source file. You can speed up the importing process for 2D sprites, UI elements, or any other Photoshopmade asset with the PSD importer. Traditionally, artists would export every layer in a Photoshop file, as a .png file to use in Unity, and then they’d have to reexport .png files with every change. This is no longer needed, as Unity supports the layered .psd format. Animated characters made for 2D, where each limb or part is in a different layer, can be imported to Unity for 2D Animation. It will set up the character so that you can rig it and animate it later. If every PSD layer is meant to be a standalone sprite, you can uncheck the Character Rig option, removing the prefab object, and get a simple sliced sprite with all the layers usable as standalone sprites.
Ensure that you import your layered PSD files with the PSD Importer, and not the default texture importer, so that you have access to all the importer features.
See more helpful tips in action in this From Photoshop to Unity with PSD Importer video tutorial.
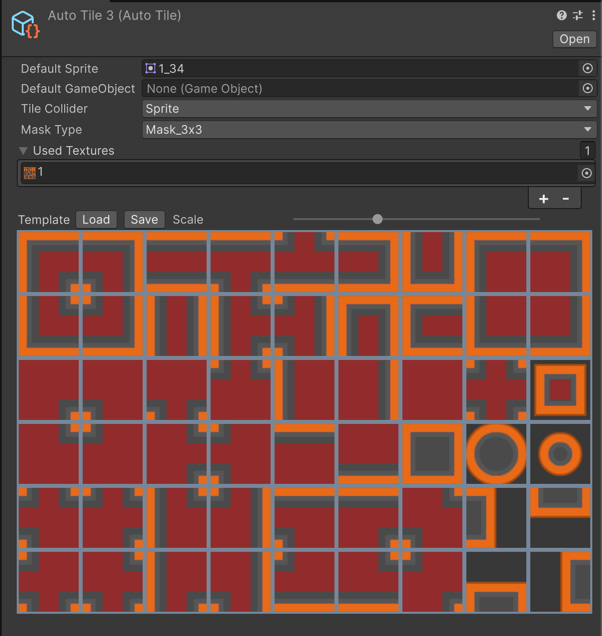
Easier rule tiles with Tilemap Editor in Unity 6.1 Unity’s Tilemap system stores and handles Tile Assets for creating grid-based 2D levels, which makes it easy to create and iterate on level design cycles within Unity. One of the challenges when working with tiles is to create all the neighbouring tiles assets and assign them to a Rule Tile Asset. In Unity 6.1, a new option, called AutoTile, simplifies this process. Load a tile sheet, select the inner areas for it, and save it to generate a tile asset that you can use in your tile palette.
AutoTile example
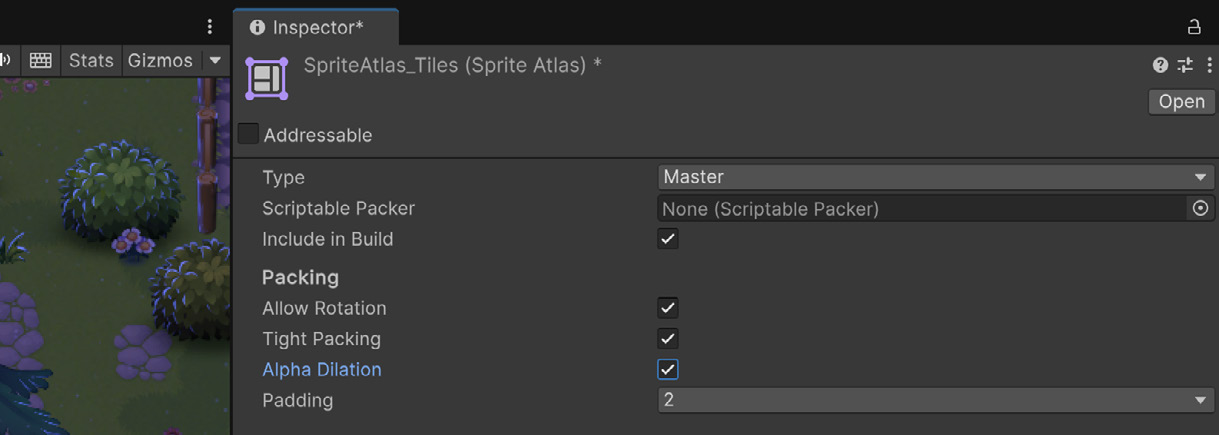
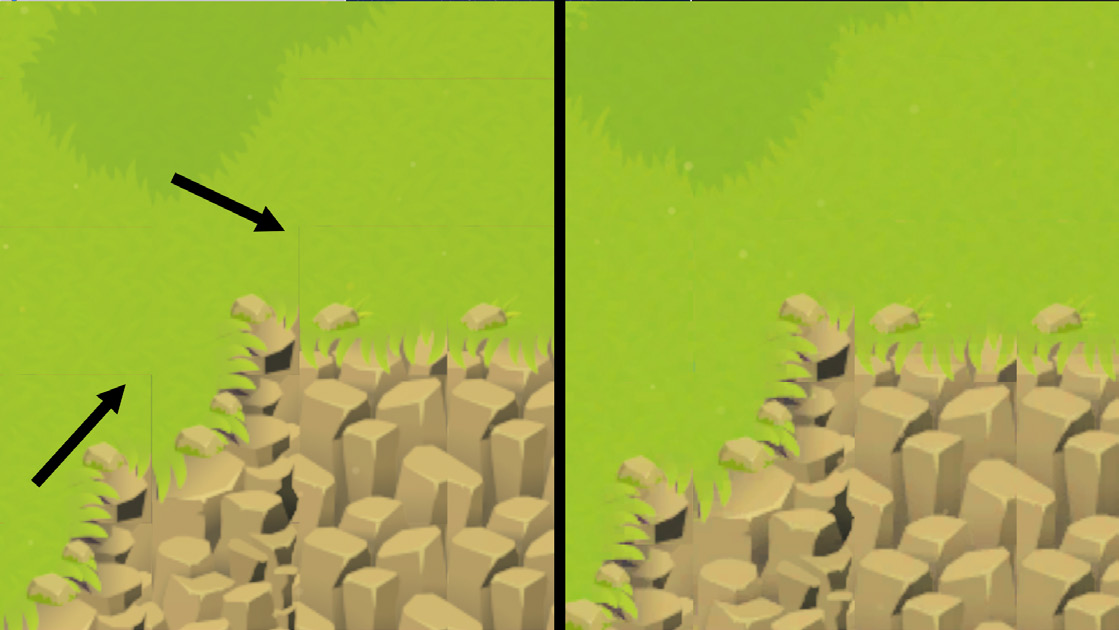
Avoid texture bleeding or small gaps between tiles With all the effort put into art and tilemaps, you’ll want to avoid the appearance of bleeding or small gaps in between tiles due to interpolation and smoothing of edges (this isn’t an issue in pixel art games, where sprites are not smoothed). If you’re not using a tile sheet then we recommend packing the sprites with Sprite Atlas to help smoothen seams, and with internal sorting in the TilemapRenderer. This will provide better project organization, performance, and creative control. Some default settings can work for most sprites but tilemaps might require a bit more tweaking. Features like avoiding rotation of sprites when packed or alpha dilation helps tiles maintain their sharp edges.
Alpha Dilation option in the Sprite Atlas
In the left image you can see some bleeding edges on tiles, which was fixed by adjusting settings in the Sprite Atlas.
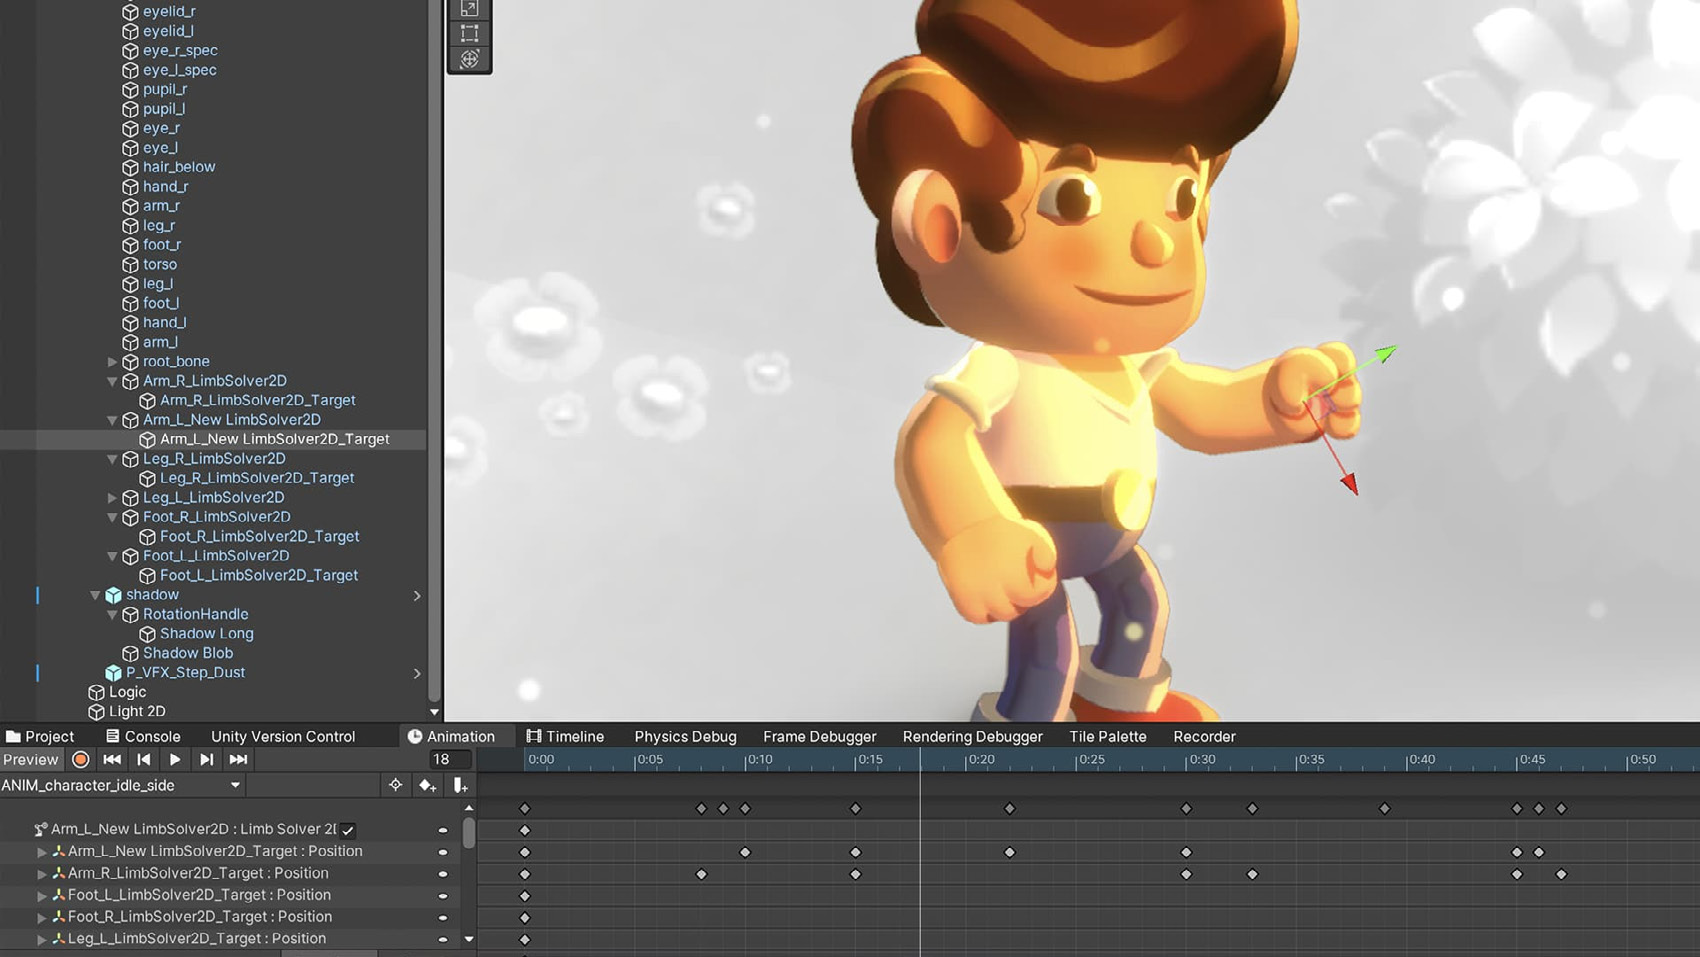
Use the 2D Inverse Kinematics system to create natural movements Unity comes with a complete solution for skeletal animation called 2D Animation. Use Unity’s 2D Inverse Kinematics (IK) system for rigging movement. Use IK to create natural and dynamic movements, such as bending knees or reaching out, without manually adjusting each bone.
Using 2D IK during the animation process for the main character in the Happy Harvest sample project
Carefully design bone hierarchies in the Sprite Editor to ensure proper control. For example, parent the hand bone to the arm bone. Test the hierarchy with simple animations to ensure that any adjustments to a higher-level bone also affect its children properly. Use Animation Blend Trees for smooth transitions between animations like walking, running, or idle states based on variables like speed or input direction. This results in natural-looking animations without abrupt changes between states.
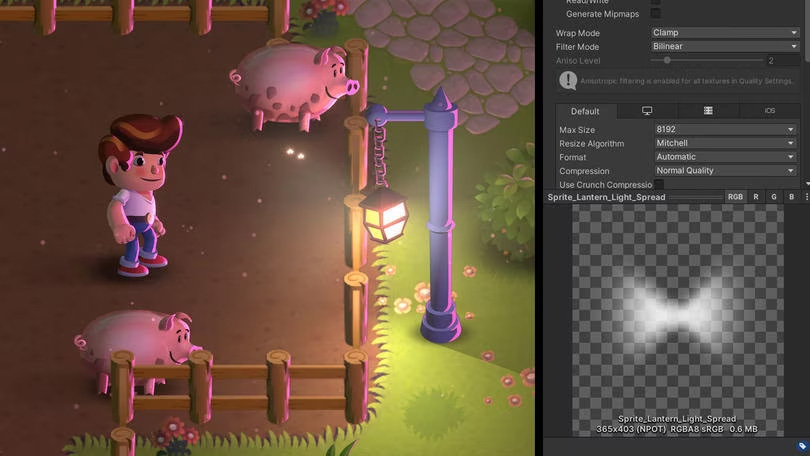
Simulate IES profiles with 2D lights It’s common in 3D software to simulate the fall-off of lights with IES profiles, for example in HDRP. Unity’s 2D light system is very flexible with easy-to-configure parameters like light colors, intensity, fall-off, and blending effects. If you want to be more precise about the fall-off effect of a light source, use a light of the type sprite and use your custom-made light effect.
Using a sprite with a halo around a hanging lamp in the Happy Harvest sample project
Get more tips on 2D lighting from this article by Martin Reinmann of Odd Bug Studio, and this page on 2D light and shadow techniques in the Universal Render Pipeline.
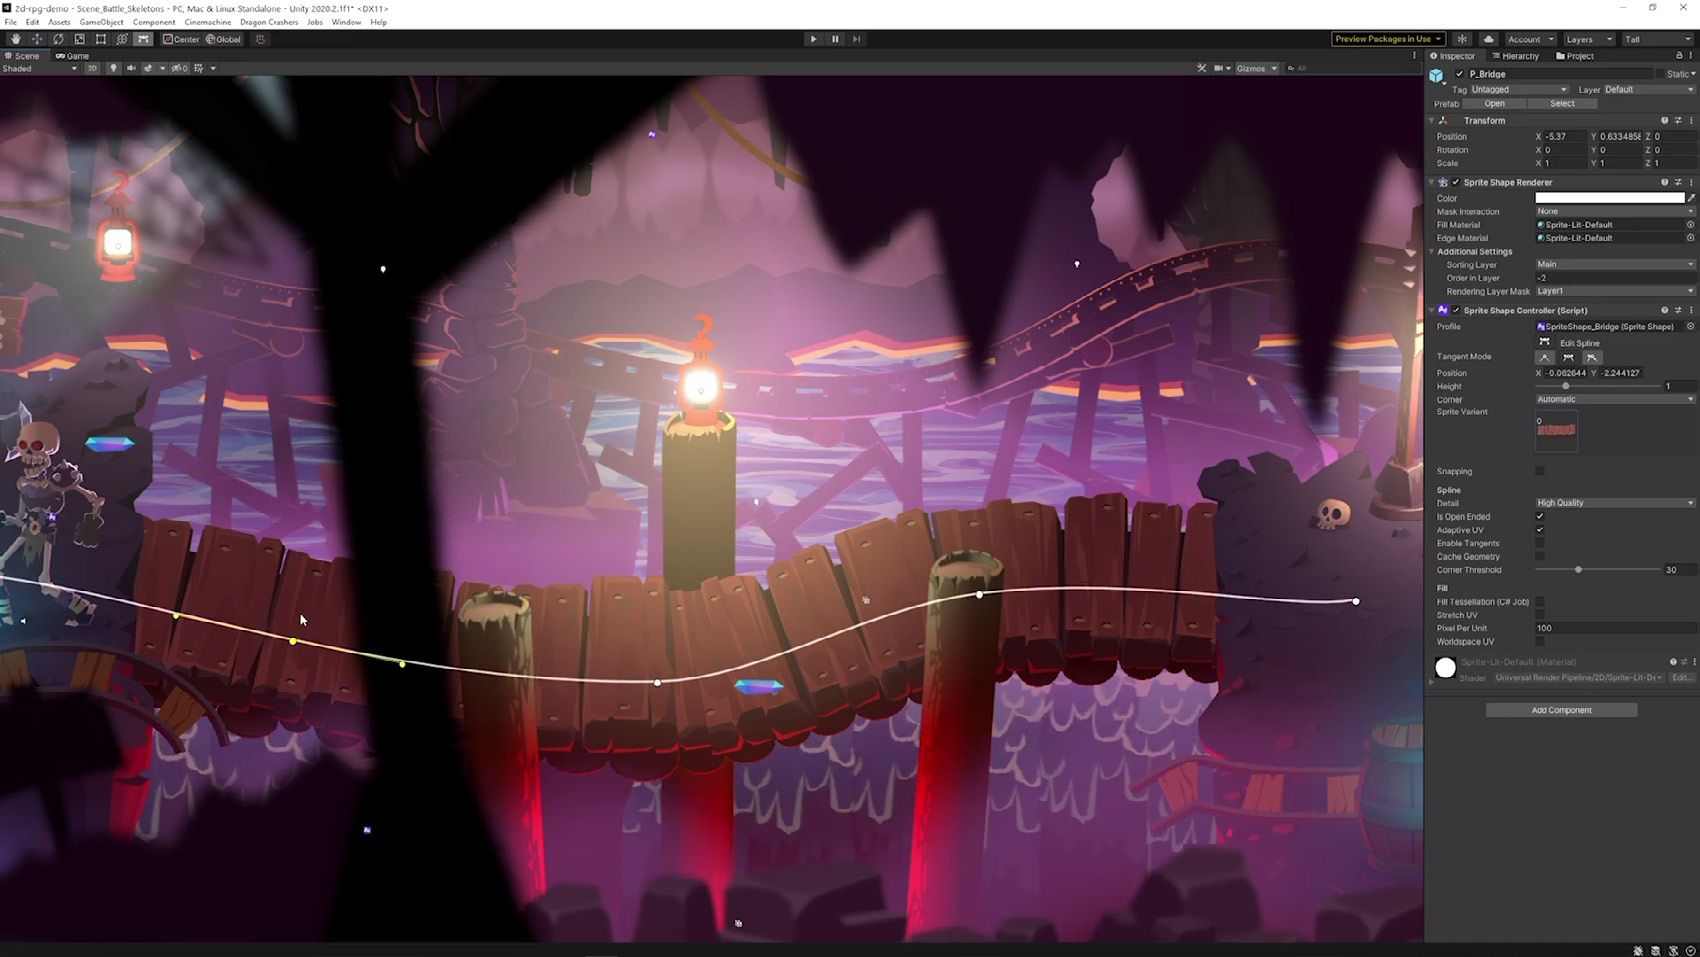
Create rich free-form 2D environments with 2D Sprite Shape 2D Sprite Shape gives you the freedom to create rich free-form 2D environments with a visual and intuitive workflow. It tiles sprites along a shape’s outline, automatically deforming and swapping them based on the outline angle.
One example of how 2D Sprite Shape is used in the Dragon Crashers 2D sample project
Sprite Shape also autogenerates a Polygon Collider 2D if you want to use paths or shapes with the Physics 2D system.
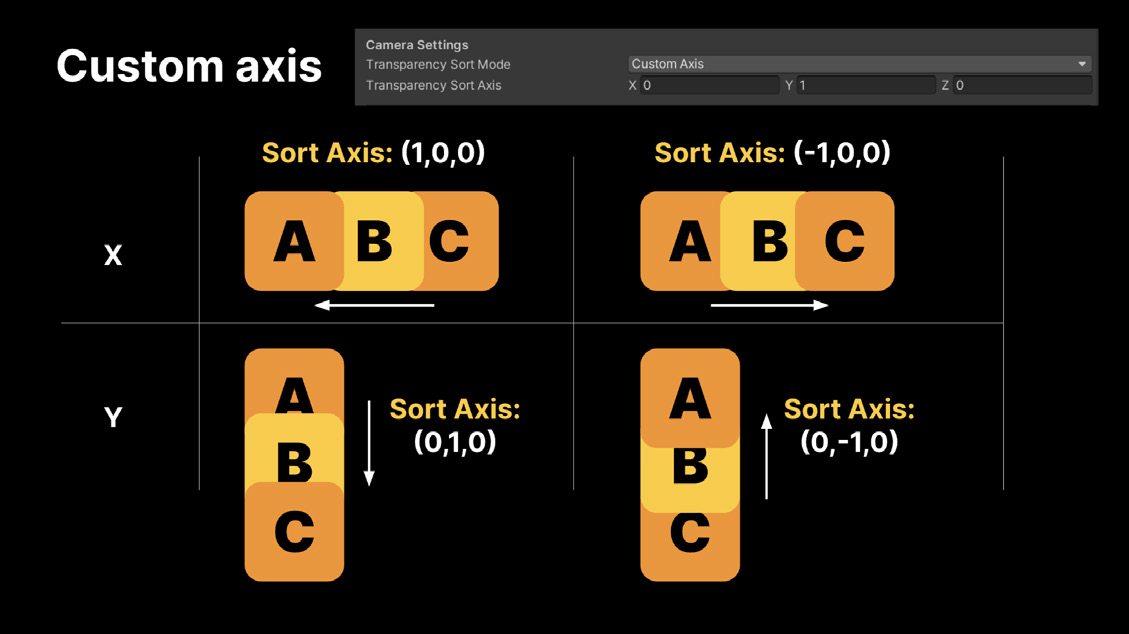
Custom Sprite Sort Axis Sort your sprites based on your preferred direction. This can be helpful if you have a number of sprites within the same layer and sorting order and you need to resolve the sorting in a particular way. For example, imagine a card game where the individual cards overlap a bit and you want the card at the bottom of the screen to be rendered on top of the others. In URP, in the 2D Renderer Asset, select General > Transparency Sort Mode, and choose Custom Axis. For example, use (0, 1, 0) for the Transparency Sort Axis to sort along the Y axis from top to bottom.
Transparency Sort Mode and Sort Axis example; check this video tutorial for other tips (based on a previous Unity version but still applicable)
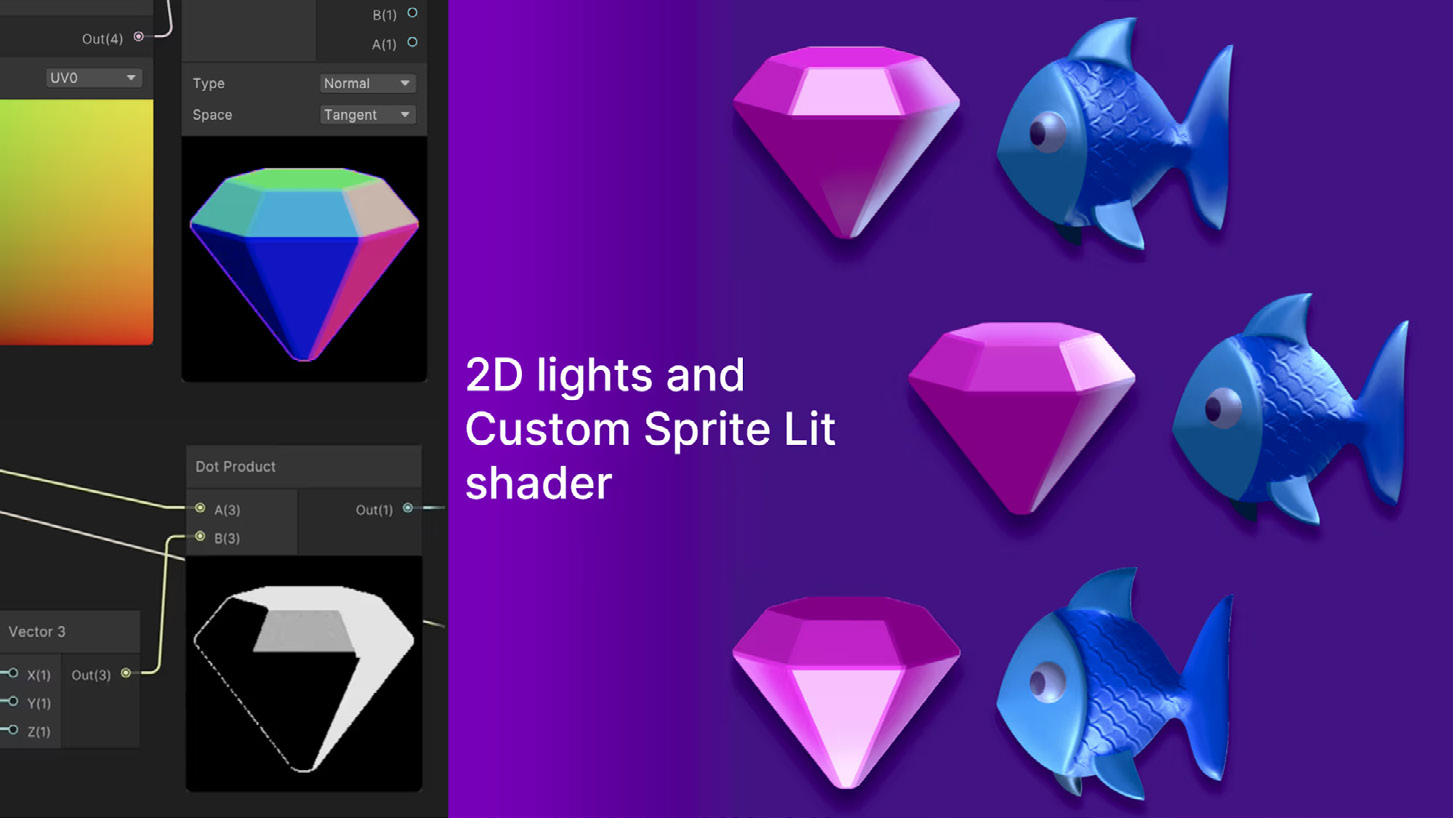
Create custom lighting with Sprite Custom Lit shaders If you’re looking to create lighting effects that are independent of global scene lights, consider using a Sprite Custom Lit shader. It’s one of the techniques used for creating the visual effects in the sample Gem Hunter Match. This shader substitutes for scene lighting, allowing the team to modify the 2D light texture information and control the lighting on each piece. The result is creative illumination of the sprites, like the shimmery effect that moves over the pieces. The light position data is moved into the shader, eliminating the need for actual light objects in the scene, which also helps to keep it neat. The encapsulated per-object lighting in the shader works well for better isolation and editing at scale and improves performance where batching is possible.
The Sprite Custom Lit Shader in Gem Hunter Match
Learn how the team used the Custom Sprite Lit Shader for full creative control with per-object lighting on 2D sprites in the Find a treasure trove of lighting and visual effects in our new match-3 sample Gem Hunter Match blog post.
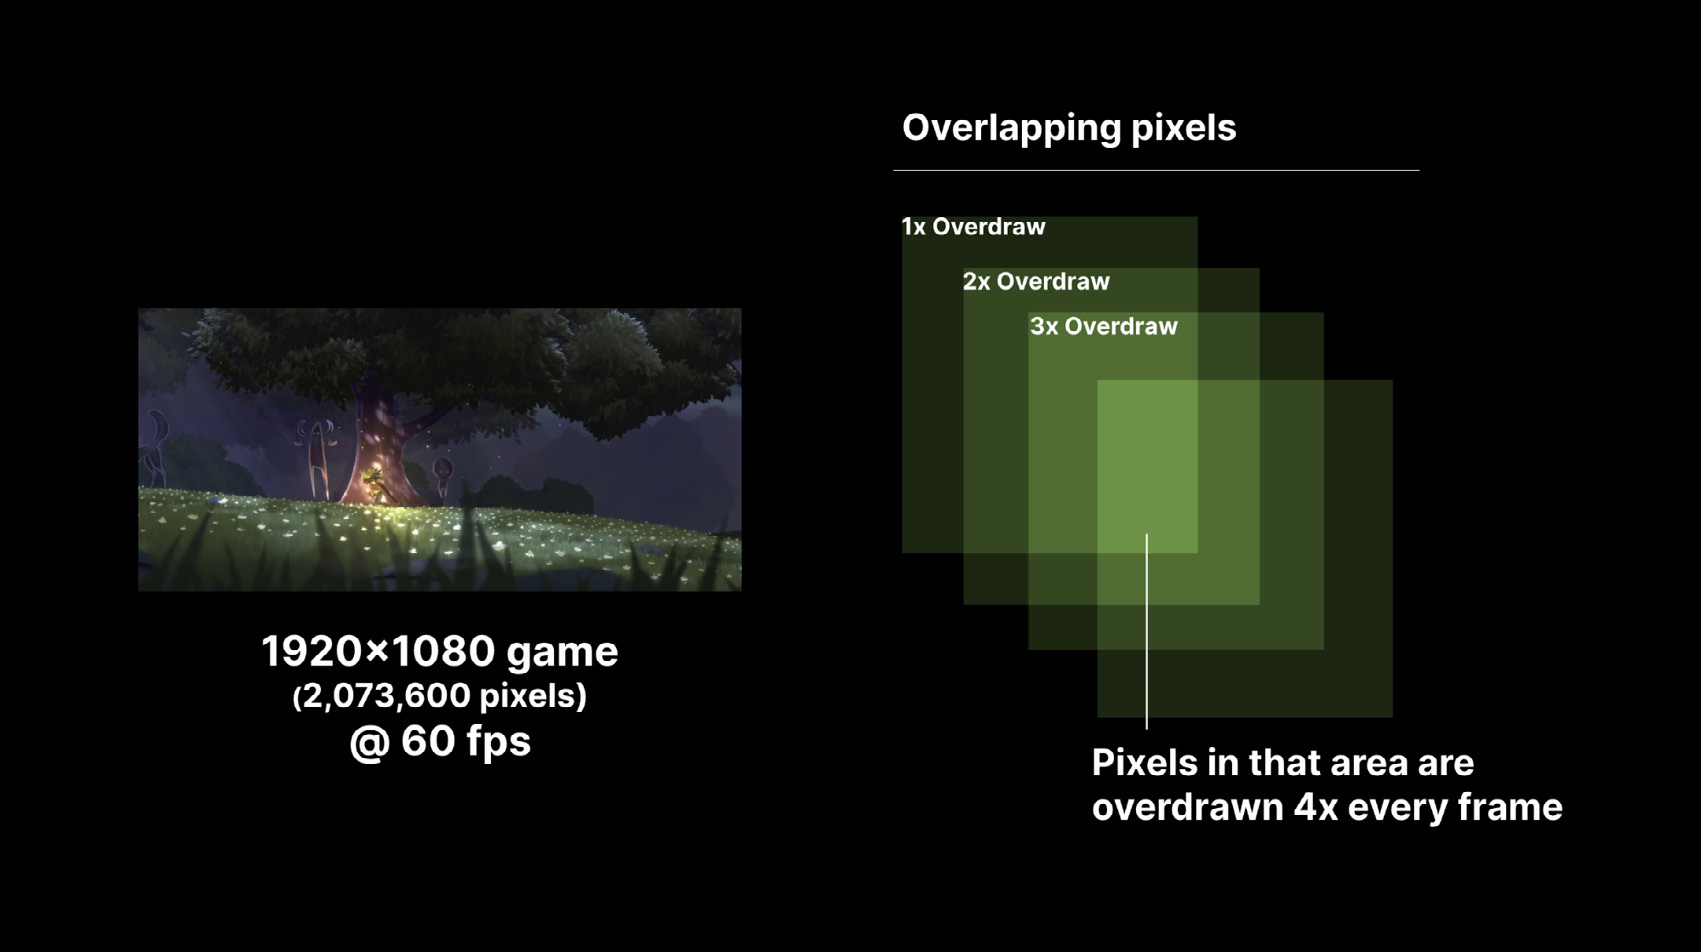
Reduce overdraw of transparency pixels Avoid overdrawing of pixels to improve performance. Switch the Mesh Type to Tight (default option) in the Import Settings. Merge overlapping graphics in a single sprite whenever possible, and try to disable sprites that could be in a background layer with no use in the game. This reduces the overdraw area and potential overlap with neighboring sprites.
Reduce overdraw between sprites.
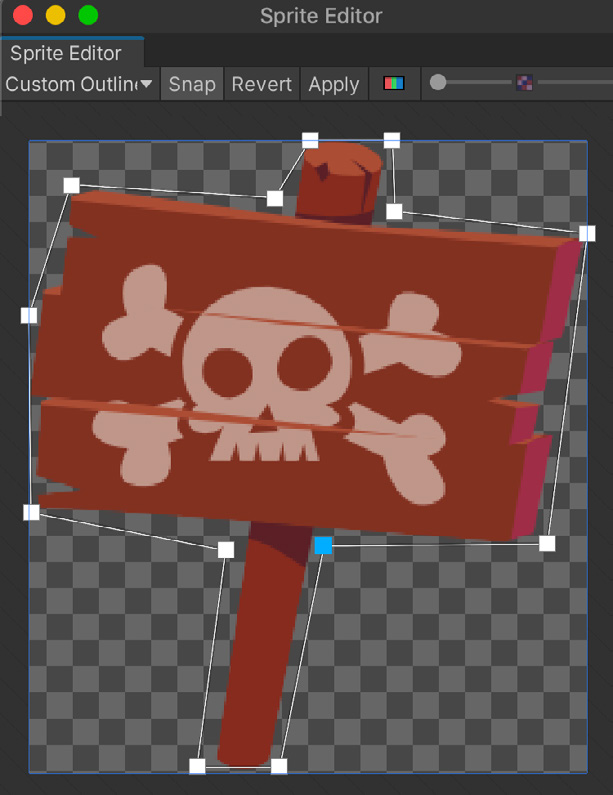
Minimize unused areas with the Sprite Editor You can also define a custom outline around each sprite using the 2D Sprite Editor; this can minimize the unused areas when packing the sprites and avoid overdraw.
The Sprite Editor with a custom outline
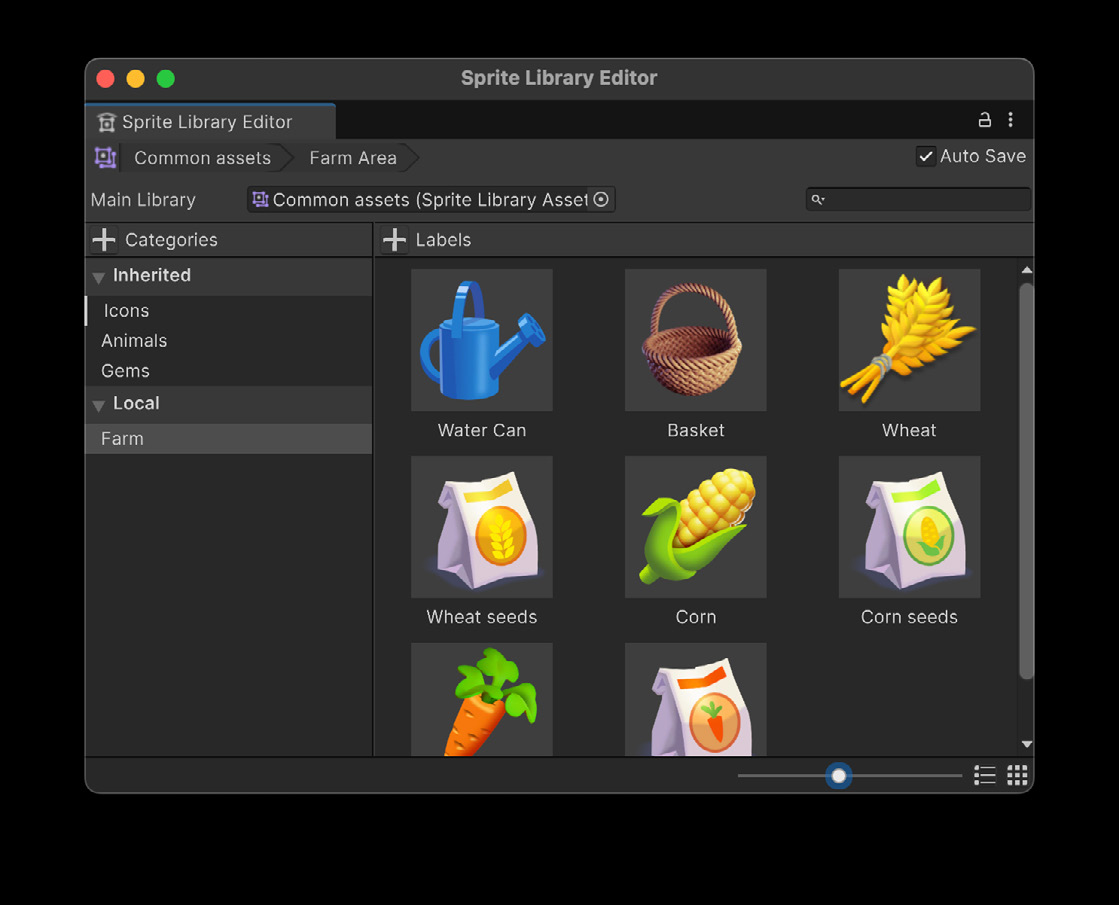
Organize your project sprites and animation with Sprite Libraries Make use of the Sprite Libraries to easily organize your sprites for level design and multi-part characters. Sprite Libraries are different from Sprite Atlases that are designed to group for rendering performance. However, because Sprite Libraries, Sprite Atlases, and Addressables are compatible, you can use them in combination to keep your larger projects organized.
The Sprite Library Editor window
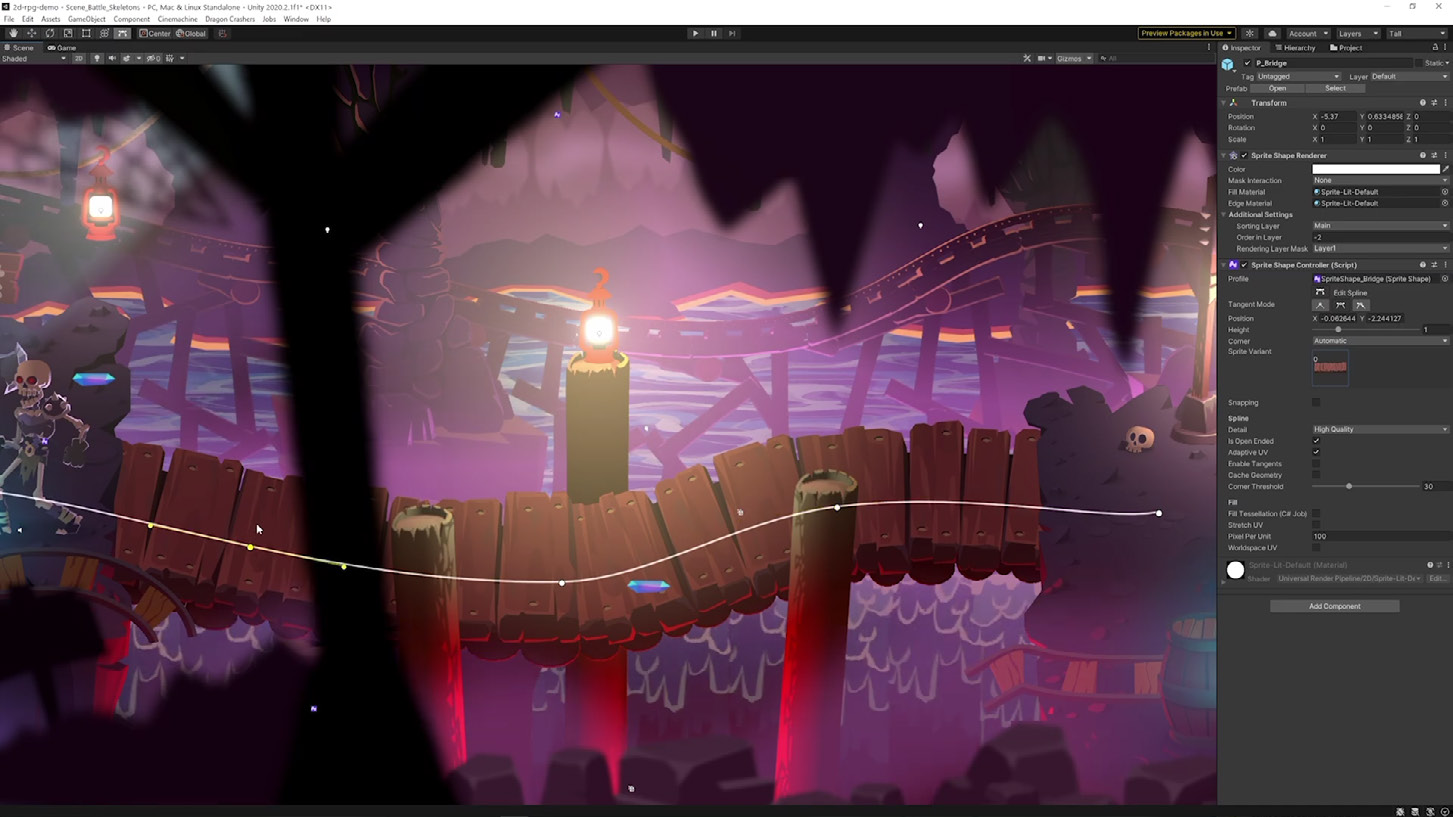
Modifying Sprite Shapes control points The Sprite Shape can help you design organic 2D terrain, creating hills, dynamic roads, trails, racetracks, or bodies of water, as well as decorative elements. You can also create gameplay features – combine with Unity 2D physics to create interactive regions (e.g., destructible terrain or deformable platforms) that can adapt and reshape in real time. You can modify the control points of the sprite shape; the API gives you access to the points at runtime or Editor time. This has a performance cost, but when it’s carefully integrated it can give your game an extra edge.
Modifying Sprite Shapes control points in the Dragon Crashers - 2D URP sample project.
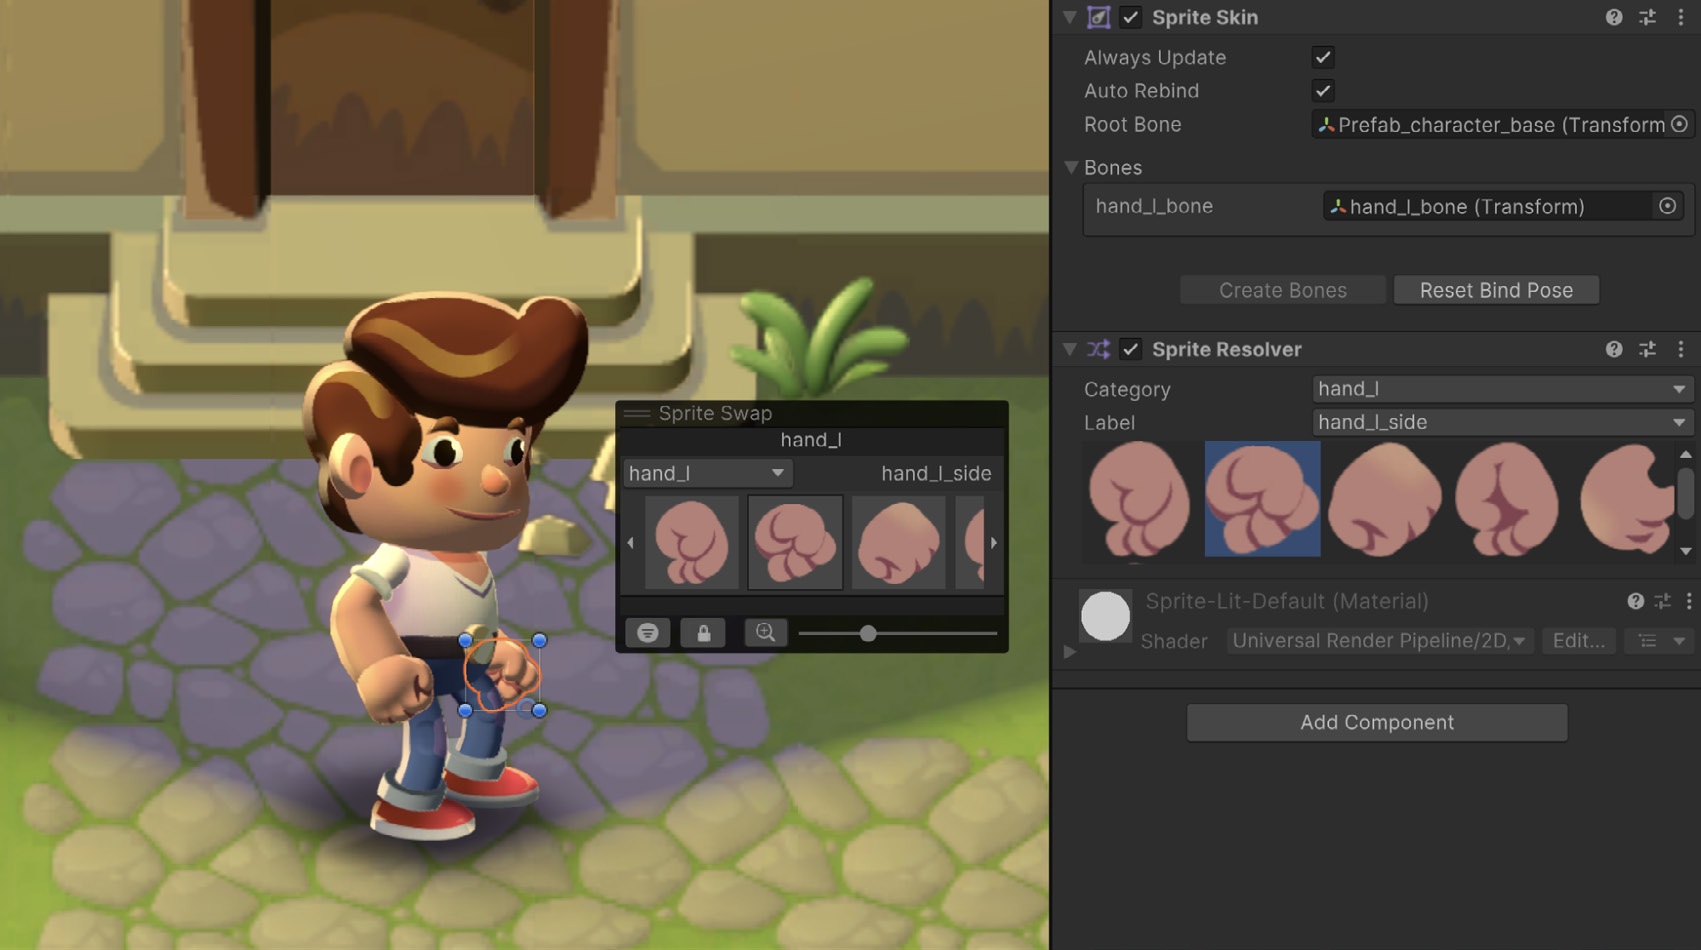
Swap sprites conveniently from the contextual menu The Sprite Resolver is a component that works alongside the 2D Sprite Library system and provides functionality to dynamically swap between different sprite visuals at runtime. It allows you to change the sprite of a GameObject without manually assigning it in the Inspector, enabling more powerful and flexible sprite management for your projects. Here are some of the best use cases for the Sprite Resolver: —
Character customization systems
Dynamic facial expressions or moods for NPCs or characters
Environmental sprite changes based on seasons or in-game events
Visual upgrades or degradations of objects
Streamlining sprite swaps in animations for greater efficiency and organization
In Unity 6 you can make use of Sprite Resolvers in the Inspector window, as well as in the Editor layout.
The Sprite Resolver component in the Sprite Library