Рабочие процессы в редакторе
Editor workflows
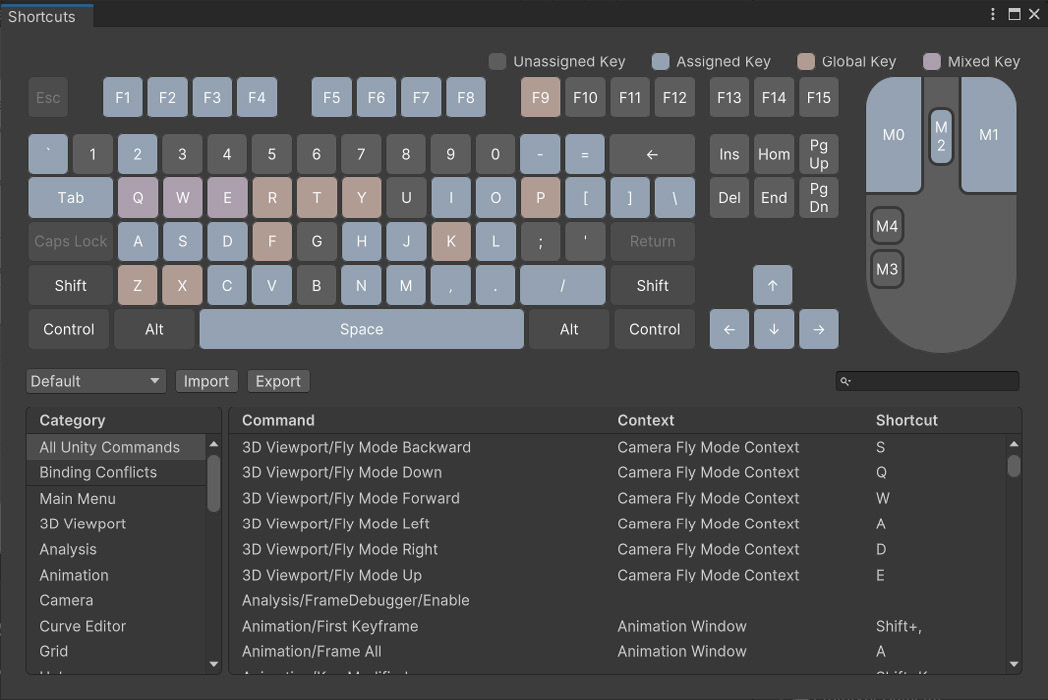
Customize your preferred keyboard shortcuts easily The Shortcuts Manager is an interactive visual interface to help you view, customize, and manage Editor hotkeys. It enables you to assign shortcuts to different contexts such as Global, Scene view, or specific Editor tools, and visualize existing bindings for any tools that you use frequently. You can also import/export shortcut profiles across the team or devices.
The Shortcuts Manager
Access the Shortcuts Manager from Unity’s main menu: —
On Windows and Linux, select Edit > Shortcuts.
On macOS, select Unity > Shortcuts.
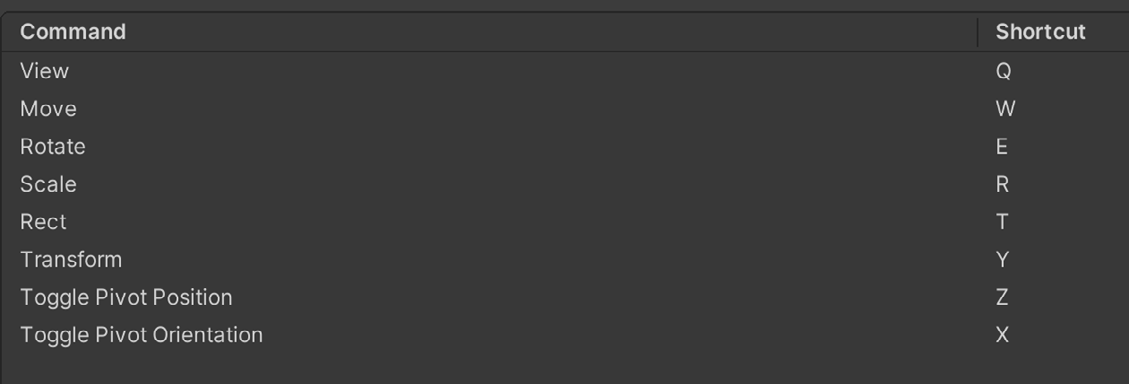
Common Shortcuts Here are some common default shortcuts: Action
Windows
Mac F
Frame Selected Duplicate Items
Ctrl
Delete GameObject
Shift
Del
Del
View/Move/Rotate/Rect/Transform
Toggle Pivot Mode
Toggle Pivot Rotation
Vertex Snap
Snap
Isolate selected objects in the Scene view Toggle Maximize Edit Prefab in Context
Ctrl
Shift
Shift
Space
Common Editor shortcuts
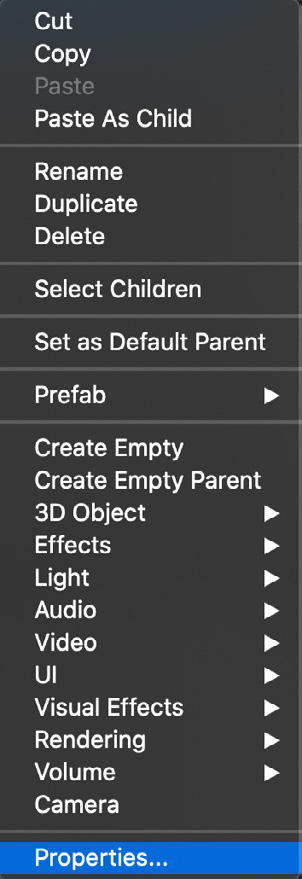
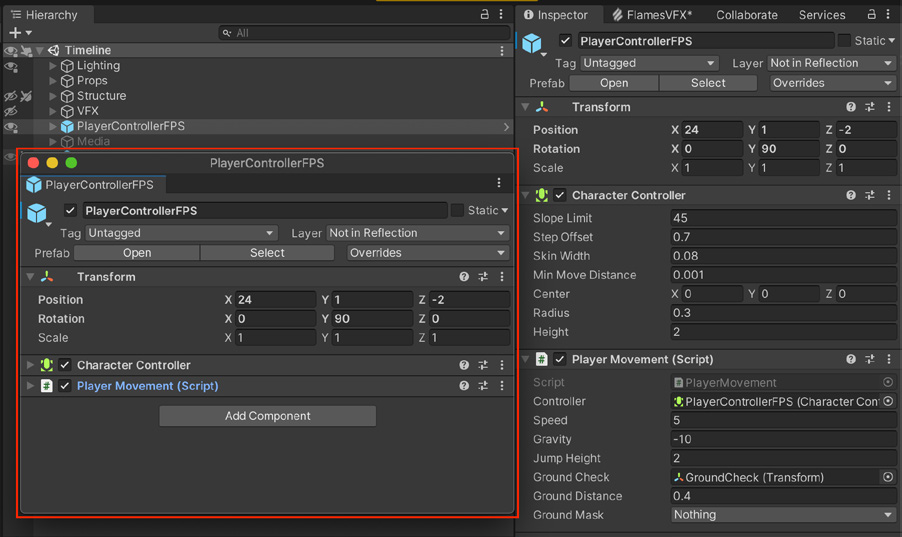
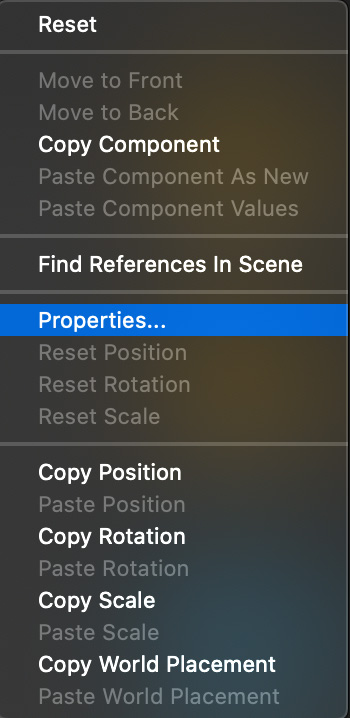
Work with multiple Inspectors The Focused Inspector window allows you to have multiple Inspector windows at the same time to display the properties for a specific GameObject, component, or asset. It always displays the properties of the item you opened it for, even if you select something else in the Scene. Right-click on a GameObject or component, and choose Properties. This reveals a floating Inspector window that you can reposition, dock, or resize like any other window.
A Focused Inspector comparing two GameObjects
Opening multiple Focused Inspectors at the same time allows you to reference multiple GameObjects while making changes to the Scene or make easy side-byside comparisons.
You can also focus on a specific component of a GameObject, requiring less screen space.
Define your own preferred default settings with Presets Presets enable you to customize and reuse the default state of components or assets in your Inspector. When you create a Preset, Unity captures the current settings of a component or asset and saves them as a .preset asset. You can then apply this configuration to other components or assets of the same type. Use Presets to enforce standards or to apply reasonable defaults to new assets. This ensures consistent standards across your team, so commonly overlooked settings don’t impact your project’s performance.
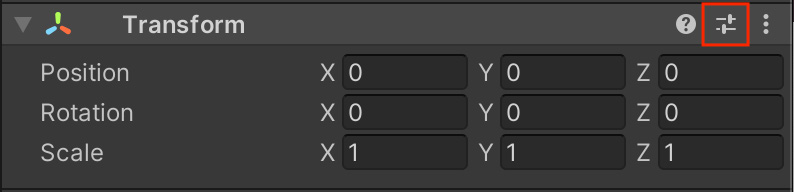
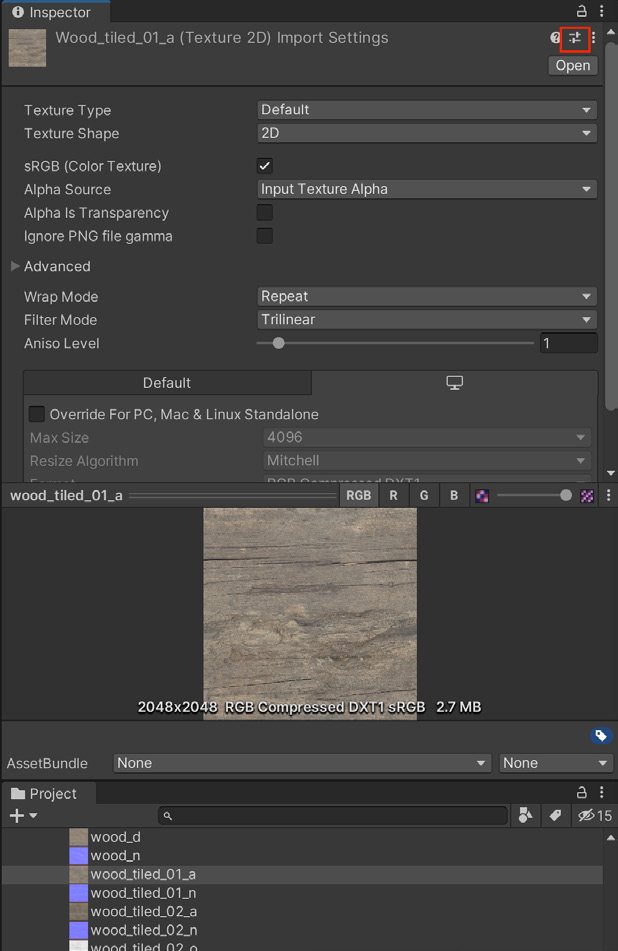
The Preset icon is highlighted here in red.
To create a preset: 1.
Click the Preset icon to the top right of the component.
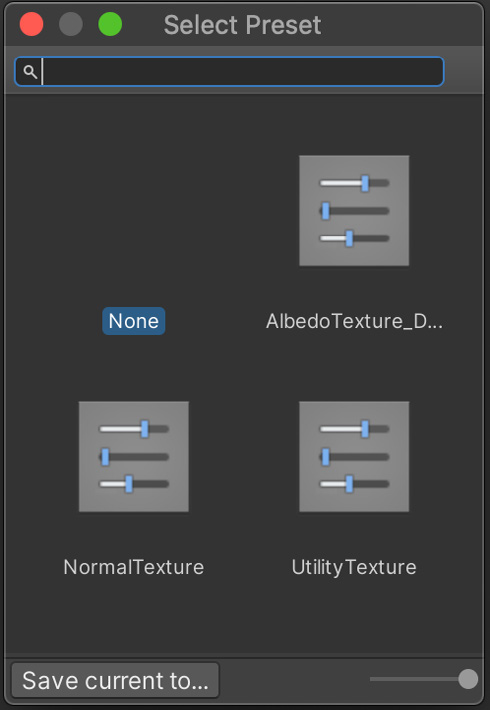
Click Save current to… to save the Preset as an asset.
Click one of the available Presets to load a set of values.
In this example, the Presets contain different Import Settings for 2D textures depending on usage (albedo, normal, or utility).
Other practical ways to use Presets: —
Create a GameObject with default values: Drag and drop a Preset asset into the Hierarchy window to create a new GameObject with the corresponding component filled in with Preset values.
Associate a specific Type with a Preset: In the Preset Manager (Project Settings > Preset Manager), specify one or more Presets per Type. Creating a new component will then default to the specified Preset values.
Use filters to select among multiple Presets: You can create multiple Presets for the same Type and use the filters) in the Preset Manager to determine which Preset is applied.
Save and reuse manager settings: Use Presets for a Manager window, so the settings can be reused; for example, if you plan to reapply the same Tags and Layers or Physics settings. Presets can reduce setup time for your next project.
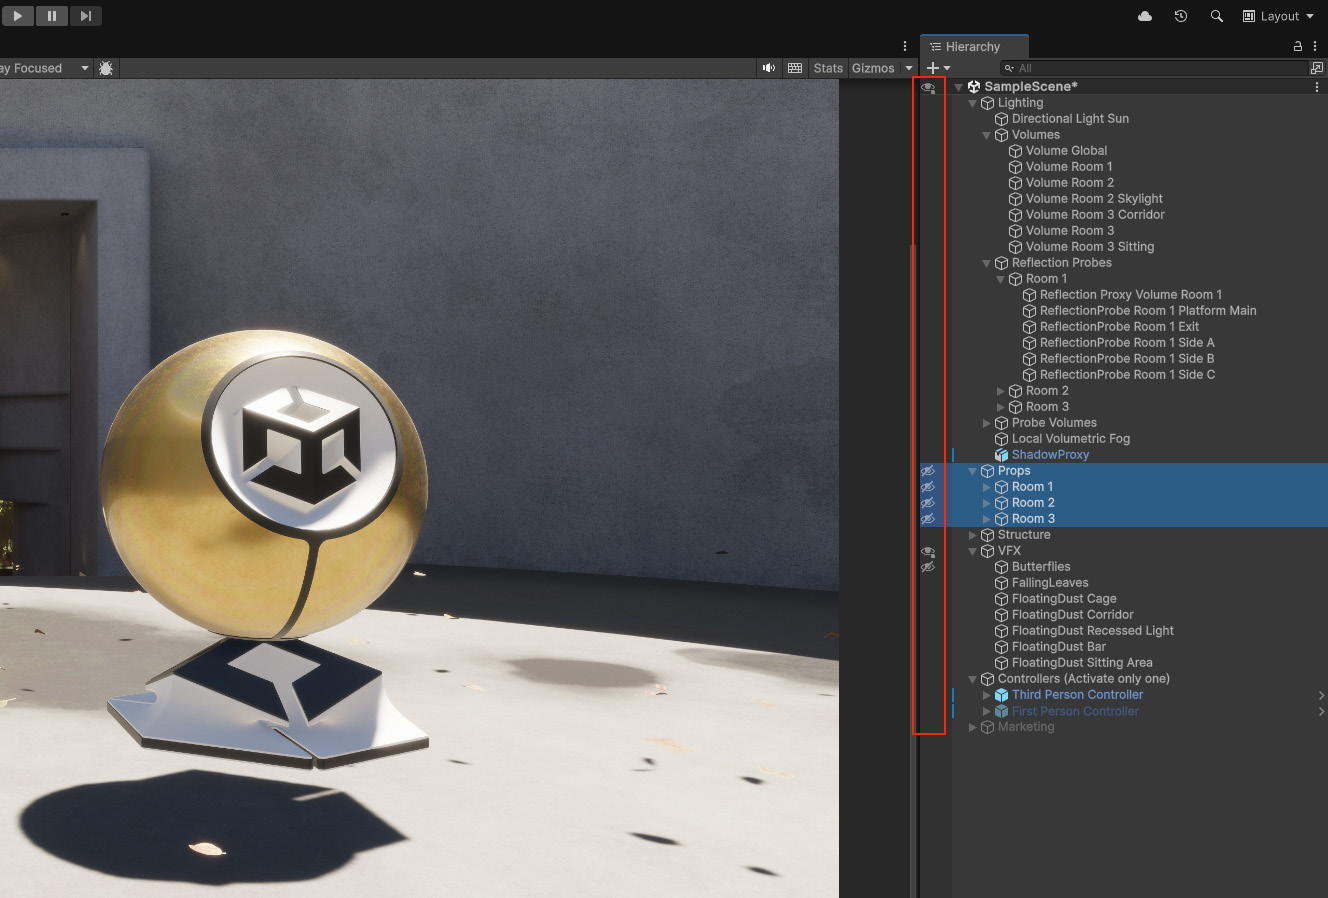
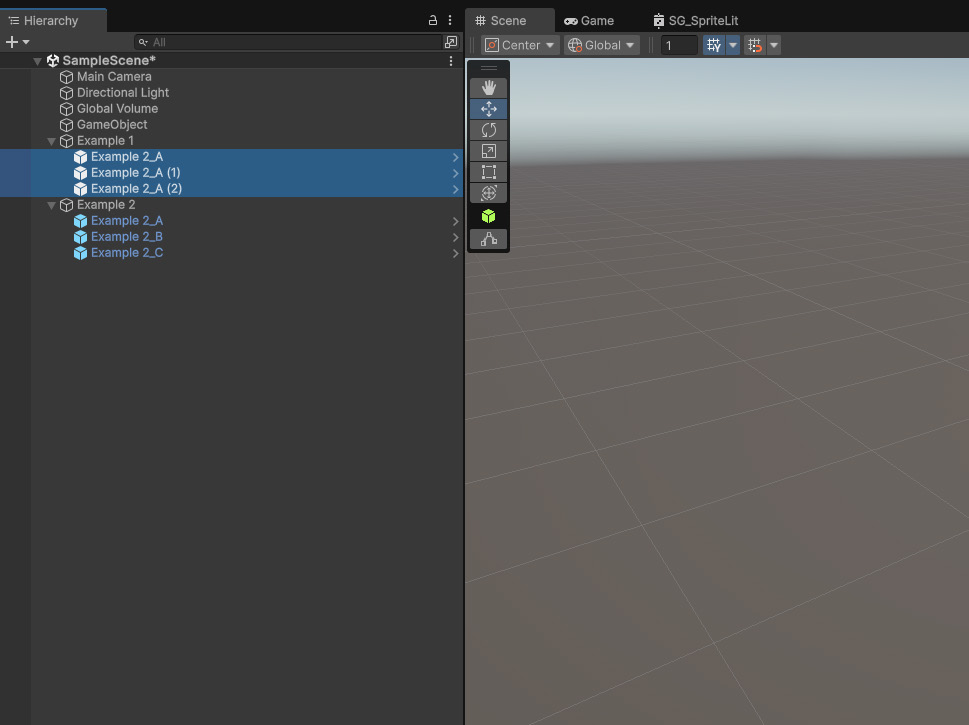
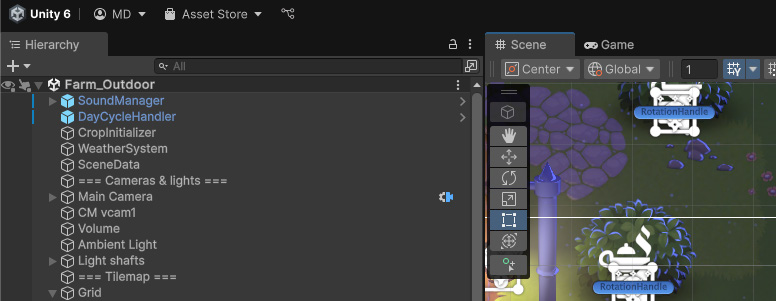
Unclutter your scene view with Scene visibility As your Scene grows larger, you can temporarily hide specific objects to make selecting and editing your GameObjects easier. Instead of deactivating the GameObjects (which can lead to unintended behavior), you can use Scene visibility controls to toggle visibility in the Scene view. Click the eye icon next to a GameObject in the Hierarchy window to toggle Scene visibility. This hides the object from the Scene view without affecting its active state or in-game visibility.
Hide objects in the Scene view using Scene visibility controls.
Note that the status icons may change in the Hierarchy, depending on whether parent or child objects become hidden.
Icon
Status The GameObject is visible, but some of its children are hidden. The GameObject is hidden, but some of its children are visible. The GameObject and its children are visible, but they only appear when you hover over the GameObject. The GameObject and its children are hidden.
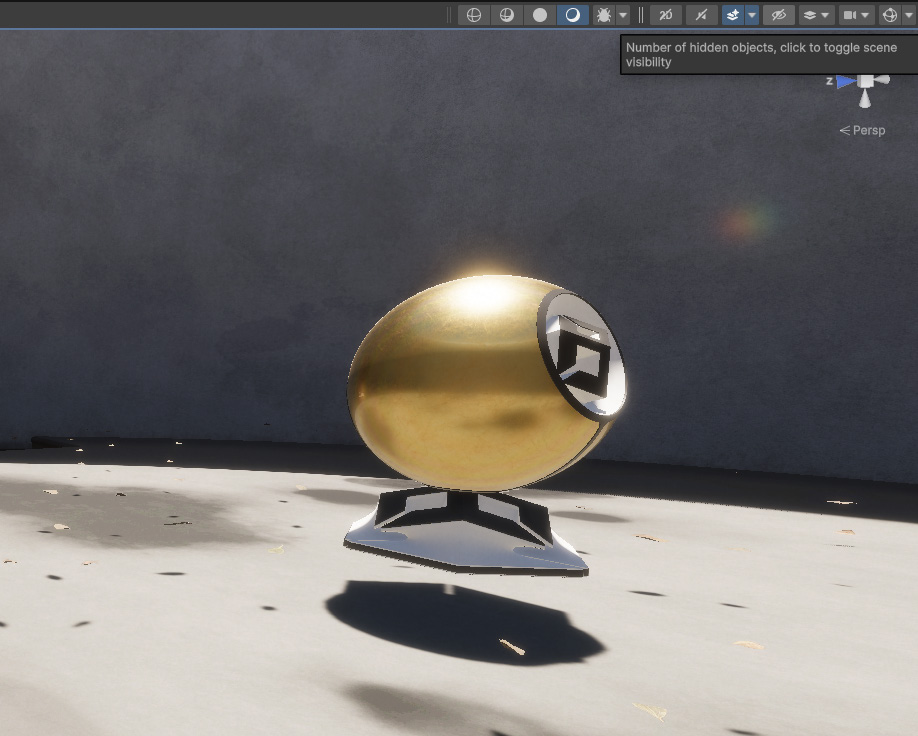
Toggle the Scene view control bar on or off to override the global Scene visibility.
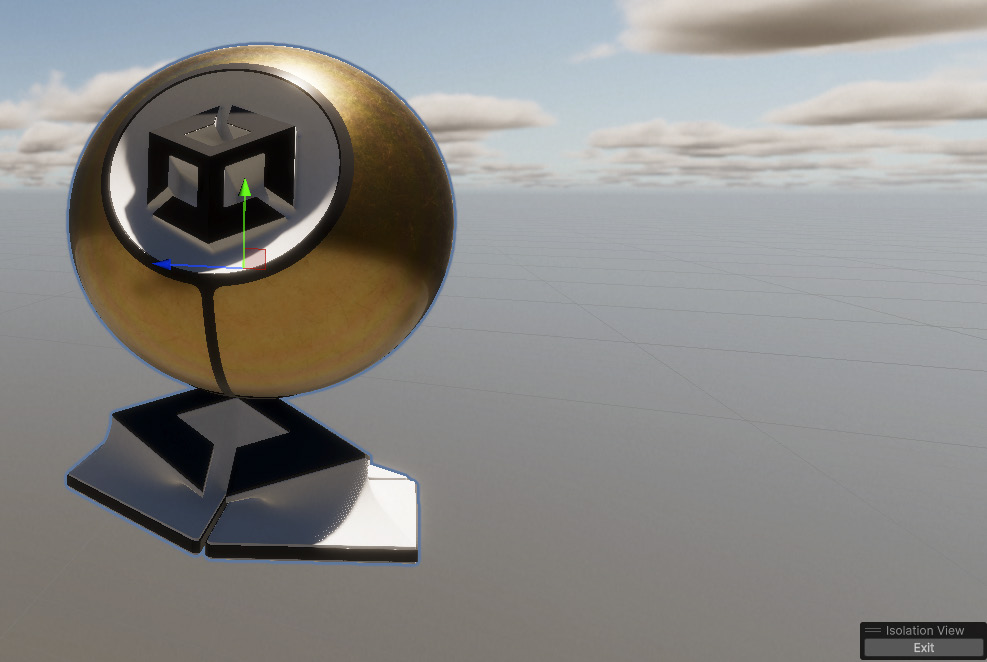
You can also use the Isolation View to concentrate on a specific object and its children. Select the GameObject in the Hierarchy window and press Shift + H to toggle it on and off. This overrides your other Scene visibility settings until you exit.
Isolation View allows you to edit a GameObject without distractions.
Remember that you can always use the Shift + spacebar shortcut to maximize the viewport and hide the rest of the Editor as well. You can also work with multiple scenes in Unity if you need to create large streaming worlds, or want to effectively manage multiple scenes at runtime. You can bake data in multiple scenes simultaneously, such as lightmaps, NavMesh data, and occlusion culling data. Also, you can edit multiple scenes using scripts within the Editor or at runtime.
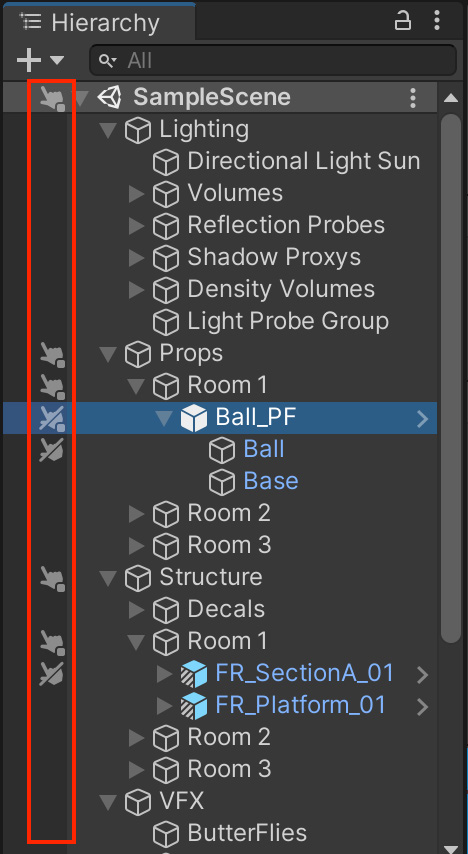
Avoid selecting the wrong objects in your Scene view Unity allows you to control whether specific GameObjects can be selected in the Scene view, similar to how you manage Scene visibility. You can toggle the Pickability state of a GameObject using the Scene visibility toolbar to block specific GameObjects from being selected in the Scene view. This is useful to avoid selecting and editing an unintended GameObject in large and complex scenes.
Hierarchy pickability
Because you can toggle pickability for a whole branch or a single object, some GameObjects may be pickable but have children or parents that are not. The following icons differentiate their status.
Icon
Status You can pick the GameObject, but you cannot pick some of its children. You cannot pick the GameObject, but you can pick some of its children. You can pick the GameObject and its children (only appears when you hover over the GameObject). You cannot pick the GameObject or its children.
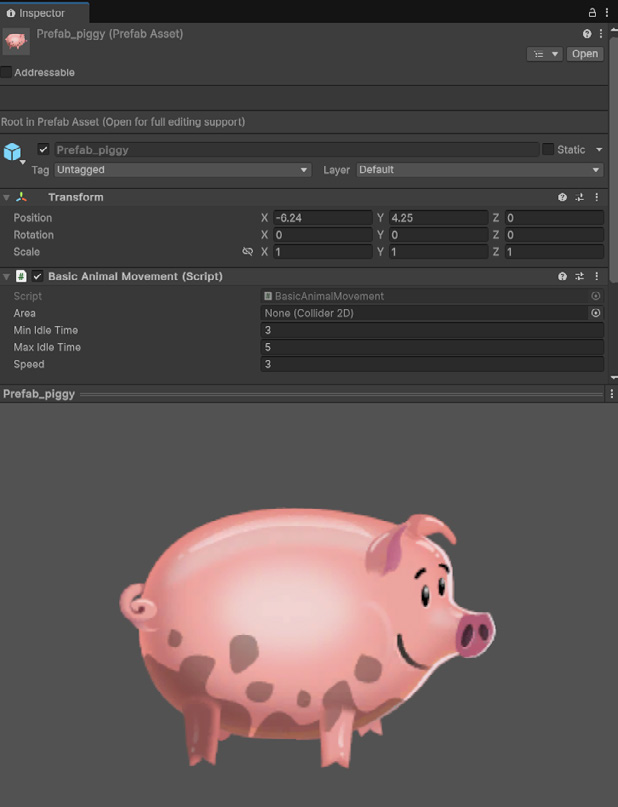
Preview your assets directly in the Inspector The Asset Preview is the visual panel in the Unity Editor, found in the bottom of the Inspector window, that allows you to see a preview or thumbnail of an asset, such as 3D models, materials, or textures. It provides a quick, interactive way to evaluate assets visually while working in the Editor. For 3D assets, like models or prefabs, you can click and drag on the Asset Preview at the bottom of the Inspector window to rotate the object and inspect it from different angles. Use this to quickly check the asset’s geometry, materials, or orientation without adding it to a scene. If the Asset Preview appears too small, you can resize it by dragging the separator above the preview area in the Inspector window. For assets like animated models, the Asset Preview often shows a simple default animation if one exists on the asset. Use this to quickly assess motion and rigging. Unity can also display thumbnails (smaller versions of the Asset Preview) directly in the Project window. Enable this by switching your Project window to the Two Column Layout and adjusting the preview slider at the bottom. This makes it easier to visually browse and organize assets.
The Asset Preview window in the Happy Harvest sample
Speed up your search in projects There are several ways for you to search efficiently in Unity across assets, scene objects, menu items, packages, APIs, settings, etc. Besides the search functionality in the Hierarchy and Project views, you can also use the search button icon in the main menu bar or use the hotkey Ctrl + K on Windows or Cmd + K on macOS to activate it.
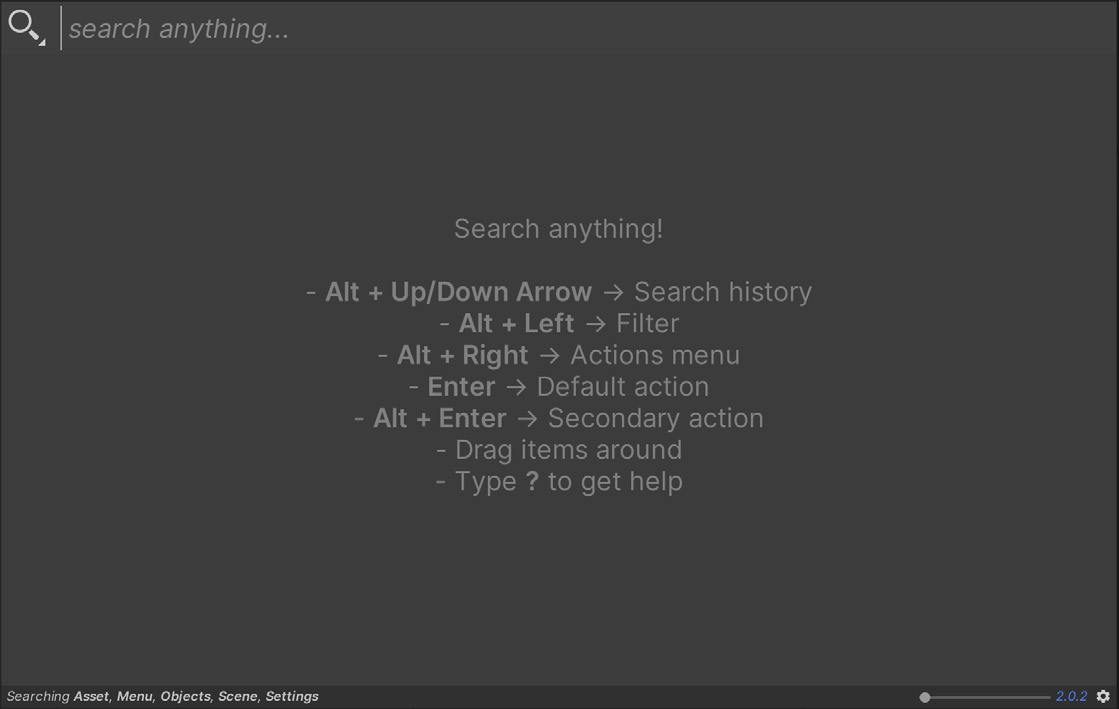
Use the hotkey or Help menu to launch QuickSearch.
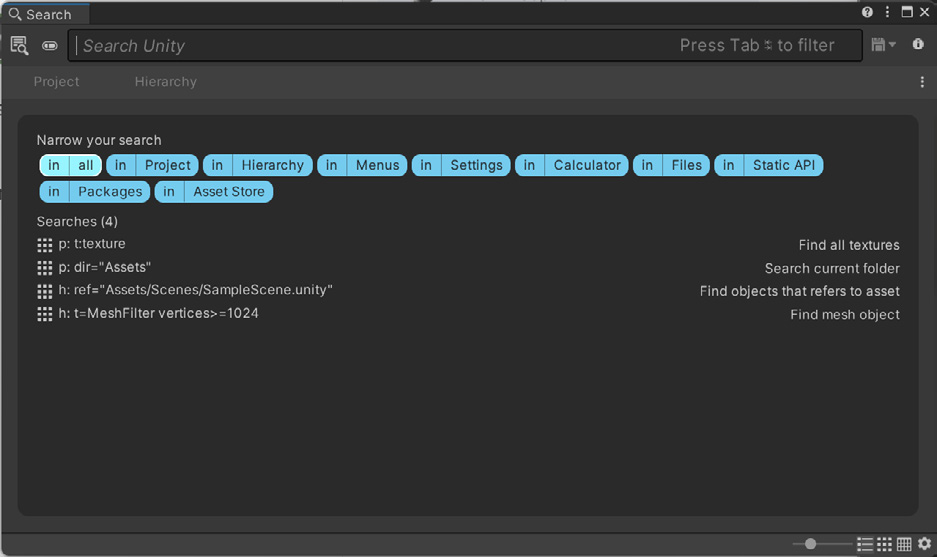
This opens a search window where it’s easy to filter your search.
The Search window
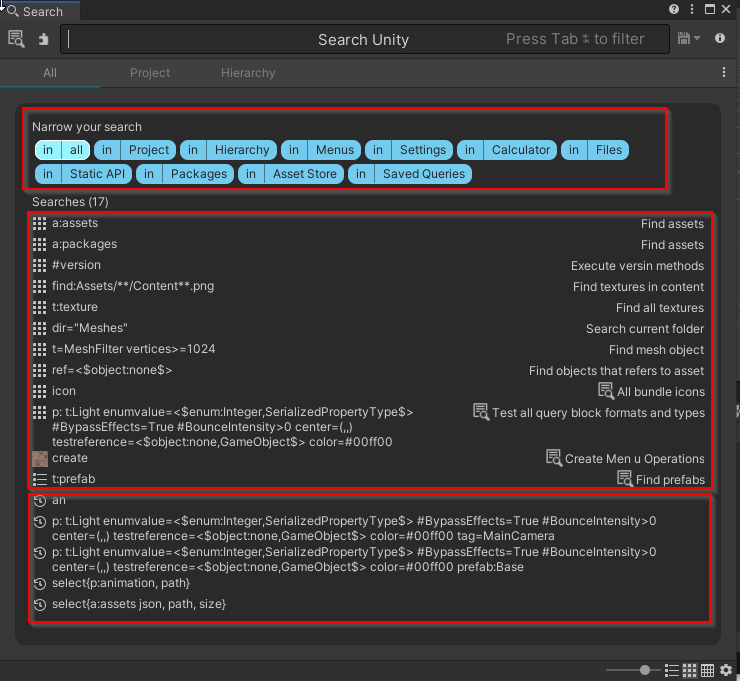
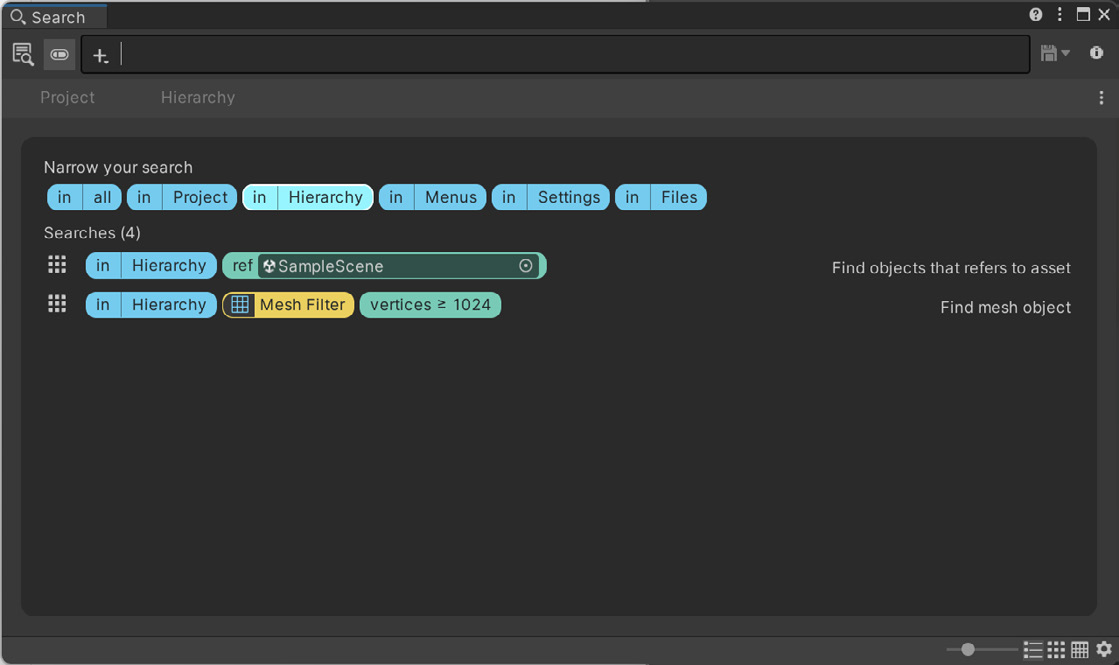
The middle section shows a list of queries available for the currently selected search area. You can click on any query to execute it. When searching for names, you can also search by type. Use the dropdown to select Type or the t: shorthand syntax, e.g., t:scene (to search all scenes) or t:texture (to search all textures). Additionally, the Search window lets you visualize objects in various ways: Compact list view, big list view or multiple sizes of grid icons. You can also display objects in a table. See the QuickSearch guide to learn more about searching both inside and outside of Unity.
Use the Query Builder to create custom search filters If you’re working with complicated search queries and you need more help when exploring your project, use the Query Builder workflow. It can be activated with the builder toggle (see puzzle button next to the Search Field).
The Query Builder
Save time by creating and saving custom queries for common tasks. For example, if you frequently need to find prefabs by certain tags or locate unused assets, define a reusable query to automate this process. The Query Builder is also integrated with the Editor, and no longer a package, so that you can streamline workflows for your development team.
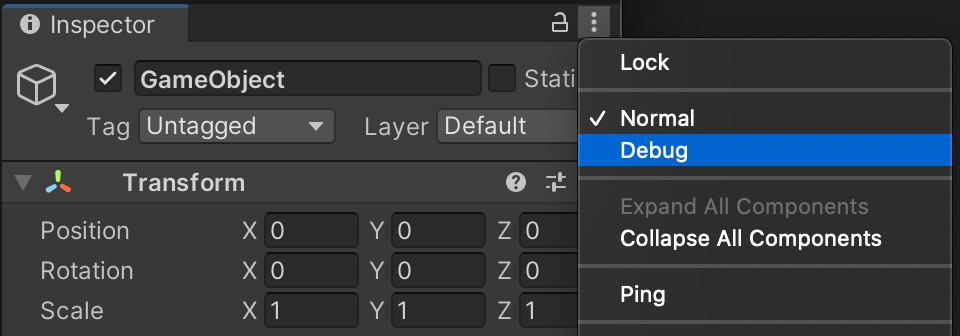
Expose debug data in the Inspector You can toggle each GameObject’s Inspector between Normal and Debug mode. Click the More Items (⁝) button to open the context menu and choose the desired mode. When using the Debug mode, all serialized fields, including private ones, hidden references, and internal Unity data are exposed in the Inspector. This can be useful for troubleshooting or inspecting components beyond their standard public interface.
Inspector Debug mode
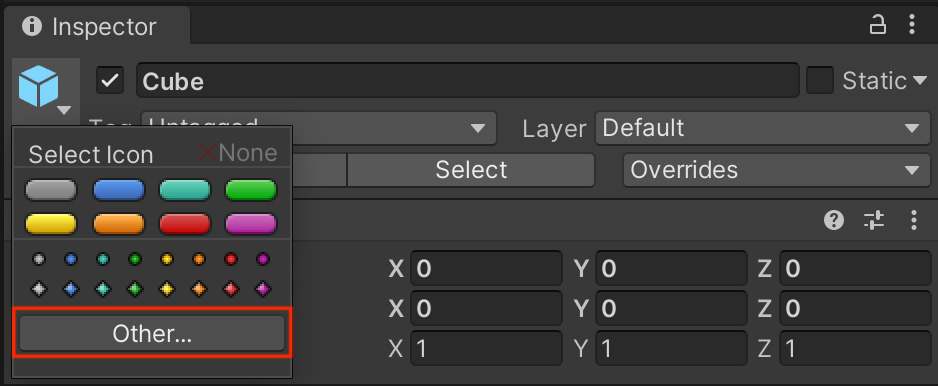
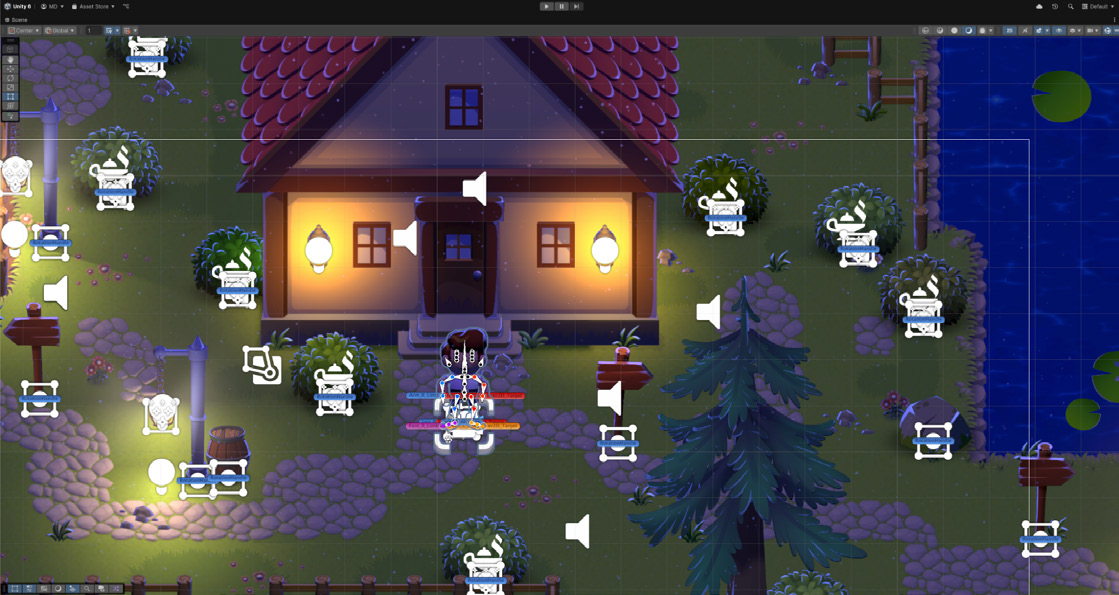
Use Custom Gizmos and icons for visual debugging Gizmos are visual overlays that appear in the Scene view, helping you locate and identify GameObjects during development. They can be especially useful for visualizing non-rendered elements like triggers, spawn points, or scripts. You can modify the icons for a GameObject using the Select Icon menu to your liking. Choose Other to define your own icon.
Use the drop-down in the Inspector to switch gizmos.
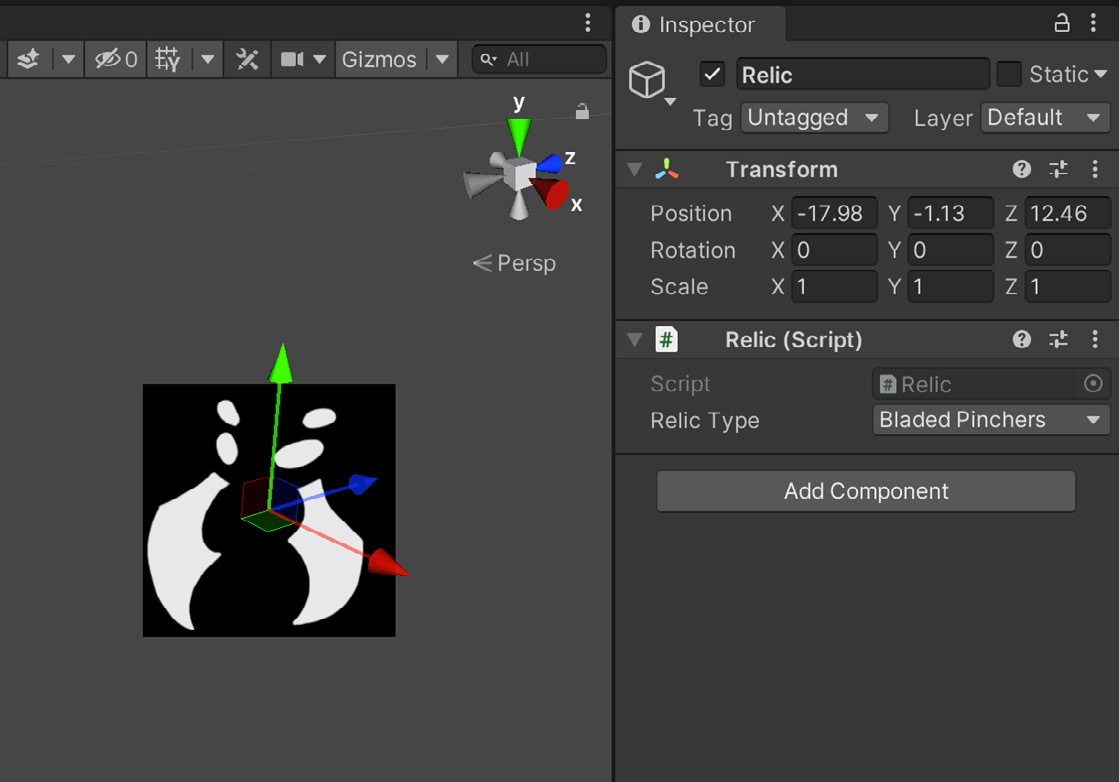
You can also create gizmos with scripts and make them interactive. For example, a gizmo could help you define a volume or area of influence for a custom component.
In this example, a script changes the gizmo based on a selection.
Use the Gizmos dialogue in the Scene control bar to toggle specific gizmos or globally enable/ disable all of them. See Creating Custom Gizmos for Development for usage examples. Also, review the APIs for Gizmos and Handles.
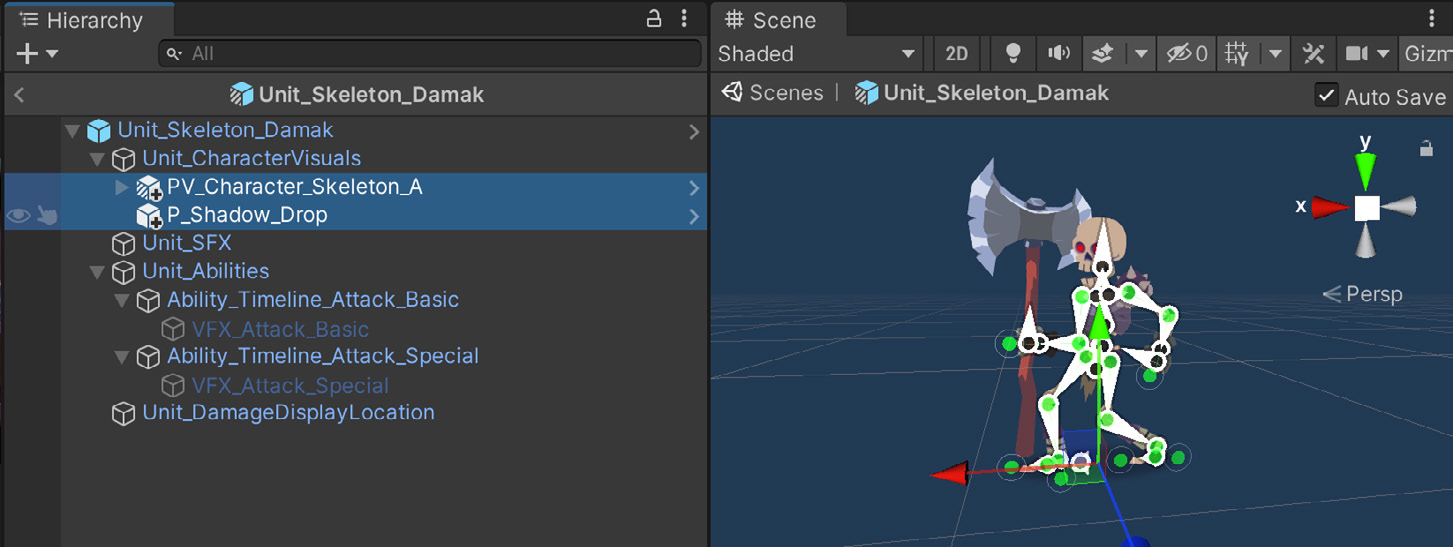
Leverage nested prefabs and prefab variant workflows Prefabs allow you to save and reuse fully configured GameObjects and lets you build your scenes flexibly and efficiently. However, you can do so much more with prefabs. You can nest prefabs, create prefab variants, or use prefabs to instantiate GameObjects at runtime. Nested prefabs allow you to parent prefabs to one another. You can now create a larger Prefab, such as a building, composed of smaller prefabs for the rooms and furniture. This makes it efficient to split development of your assets over a team of multiple artists and developers, who can all work on different parts of the content simultaneously.
An example of nested prefabs in the Dragon Crashers sample project
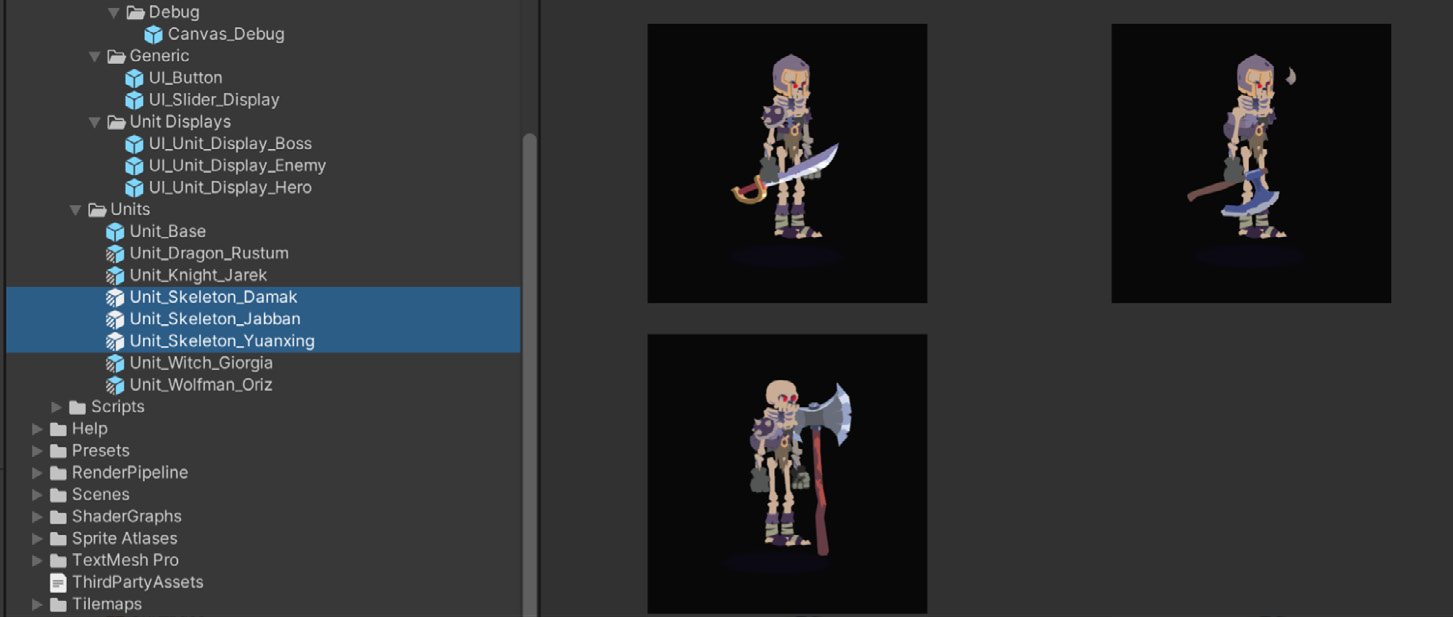
A prefab variant allows you to derive a prefab from other prefabs, much like inheritance in object-oriented programming. To change the variant, just override certain parts without worry of impacting the original. You can also remove all modifications and revert to the base prefab at any time. Alternatively, if you want to change all of your variants at once, apply changes directly onto the base prefab itself.
Prefab variants in the Dragon Crashers sample project
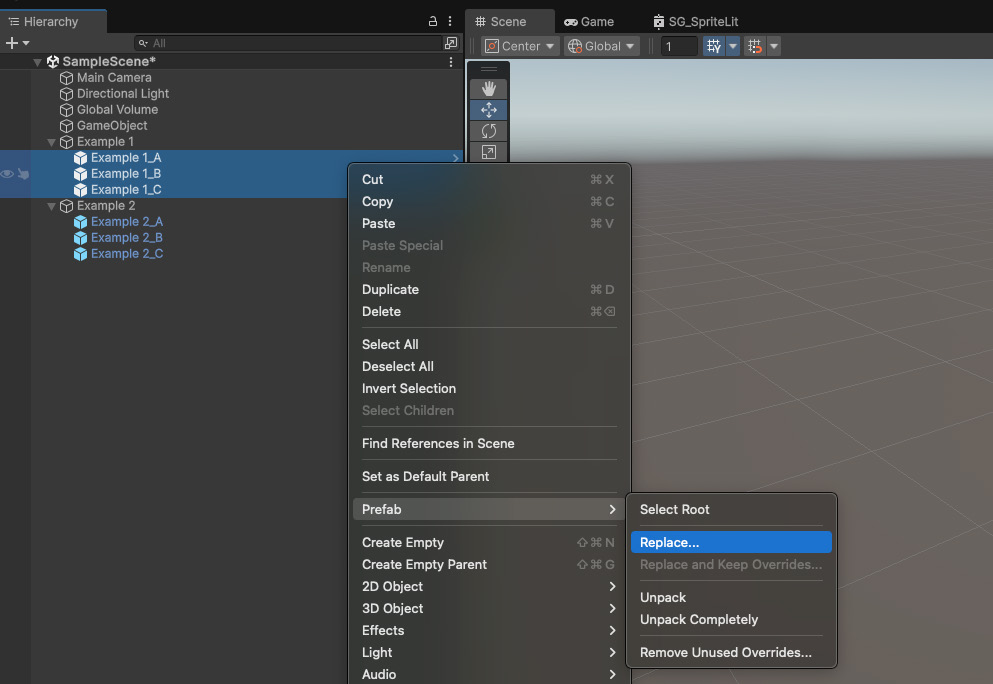
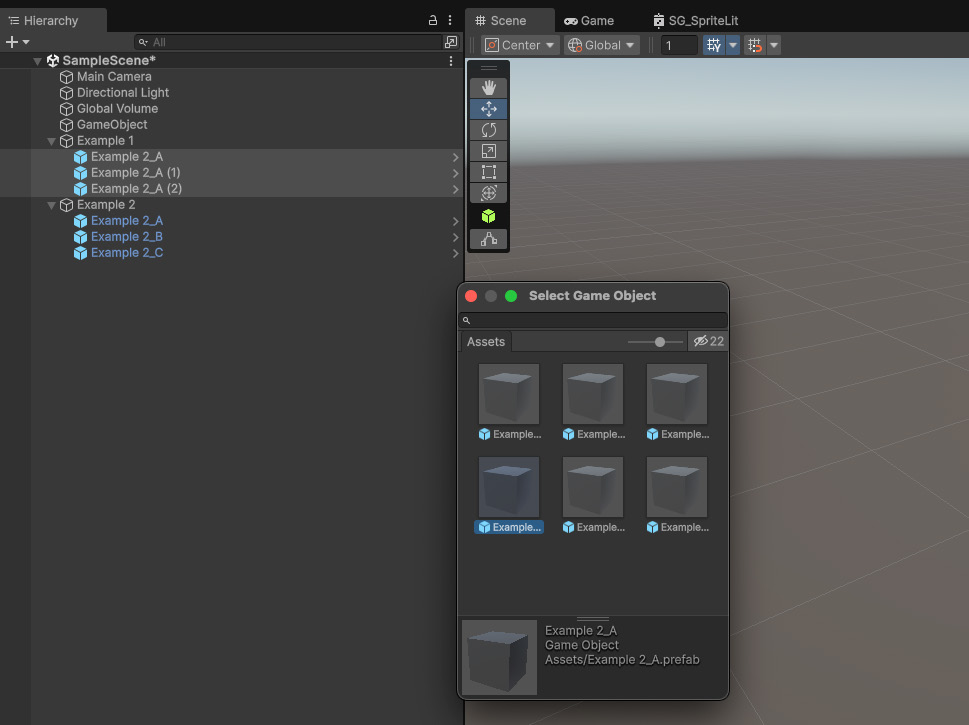
To replace one or many prefabs in a scene with another prefab, press Ctrl (on Windows) or Cmd (on macOS) and drag the new prefab onto the old ones.
Replacing a prefab in the Hierarchy window
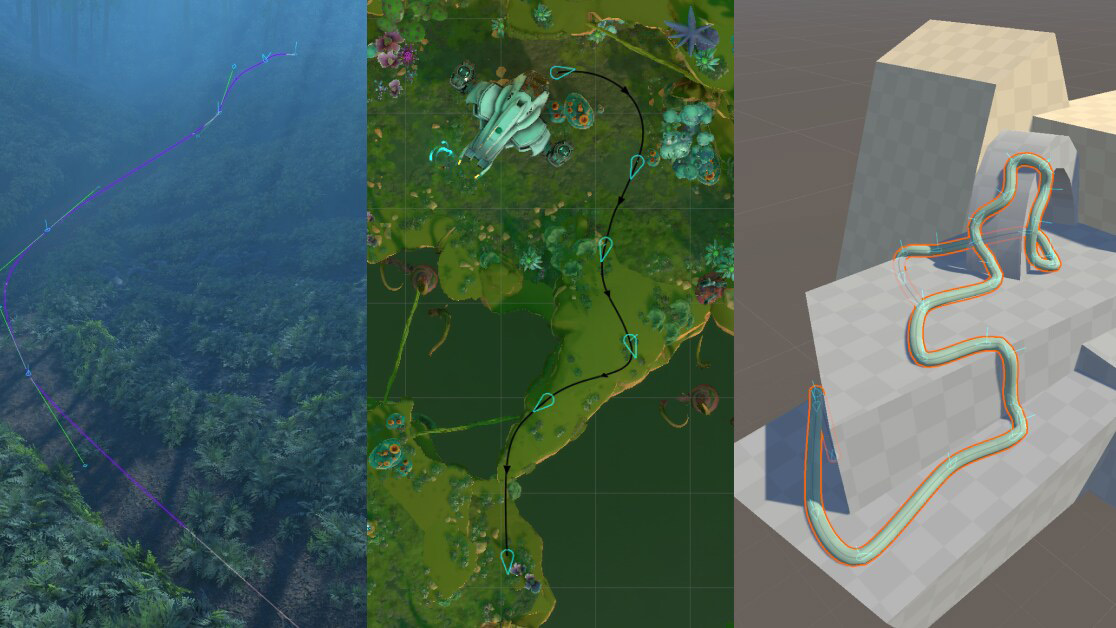
Create curved paths with ease using the Splines package The Splines package allows you to create and edit spline-based paths directly within the Editor. Splines are useful for defining smooth, curved paths that can drive elements such as roads, rivers, rails, camera tracks, or any path-based visual or gameplay element.
Examples of use cases for splines, left to right: A road through a forest, an animation path, tube meshes; find other samples showcasing all the possibilities in the Splines Package Manager page once it’s installed
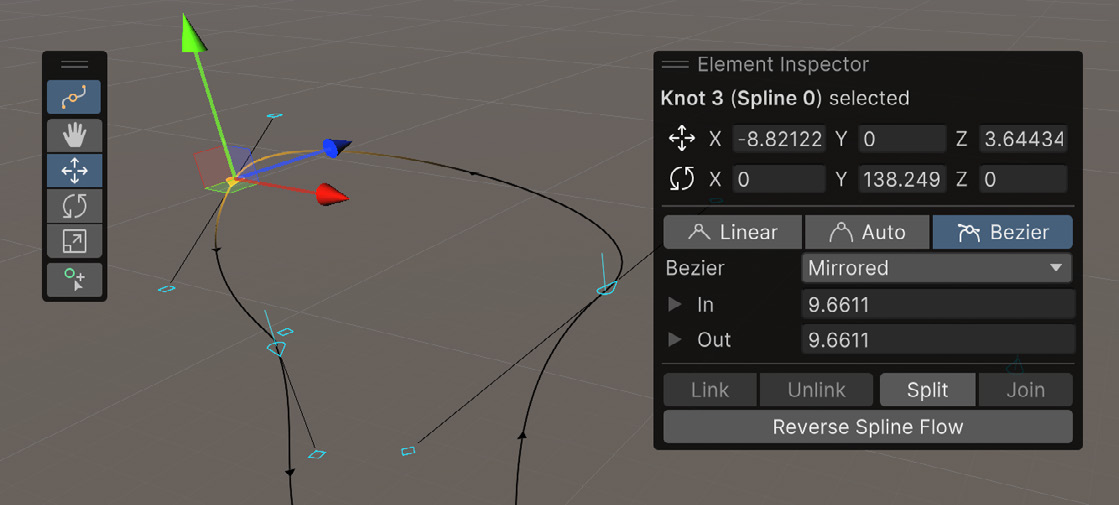
The handles and controls for splines in Unity resemble vector or 3D drawing tools from well-known DCC applications.
Once you’ve created a spline, both programmers and artists can use it in interesting ways. For example, programmers can read points of the spline and use them in the game logic with the APIs. Check out the How to get started with the splines package video tutorial to learn how to use the Splines package to solve common spline use cases, animate a GameObject’s position and rotation along a spline, and instantiate prefabs along a spline to create environments.
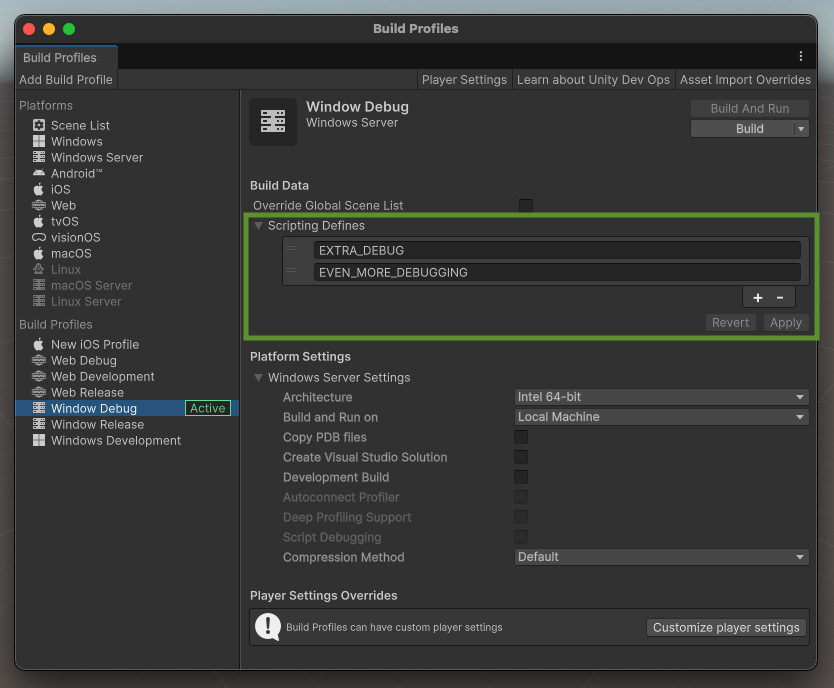
Customize your builds with Build Profiles The Build Profile workflow is a new way to configure builds in Unity 6. This new workflow supports multiple configurations for any platform, each with different settings. Create custom Build Profiles in Unity 6 to efficiently configure different build settings for specific platforms or needs (e.g., debugging, testing, production). This allows you to quickly switch between build configurations that optimize your workflow.
Use the Scripting Defines and Player Settings Overrides options within Build Profiles to set build-specific configurations, such as enabling debug tools or customizing splash images, and share these easily with your team through version control.
More resources: —
What you need to know about Build Profiles in Unity 6
Everything you need to know about Build Profiles in Unity 6 | Unite 2024
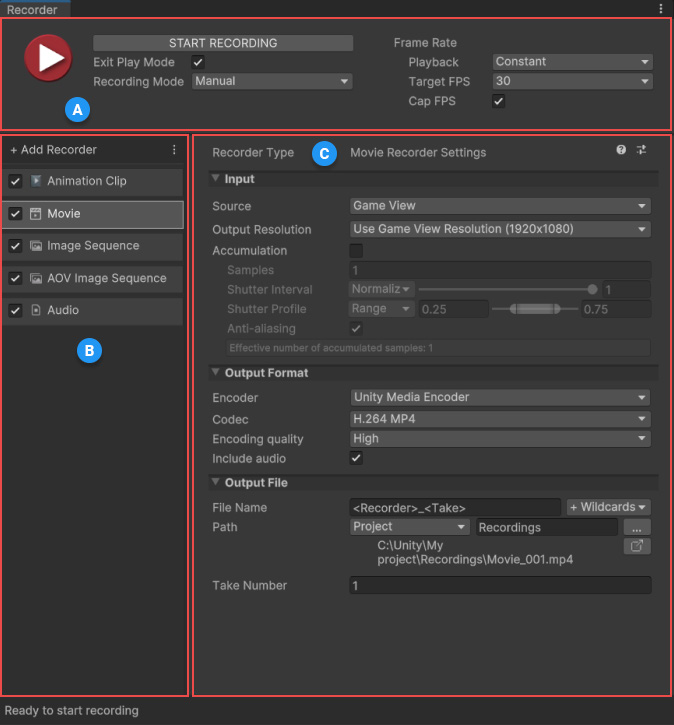
Capture smooth game footage with the Recorder package The Unity Recorder package allows you to capture and export data from your project during Play Mode. This is useful for recording gameplay, cinematics, or other runtime sequences as video files, image sequences, or animation data. You can find the Recorder window in the Unity Editor main menu under Window. When you open the Recorder window, Unity restores the values from the last recording session, allowing for a quick restart or adjustments. You can capture images or footage with a transparent background. Unity Recorder can capture the alpha channel and output transparency under certain conditions that depend on the render pipeline you’re using and the Recorder settings.
The Unity Recorder window
Editor workflow tips 1.
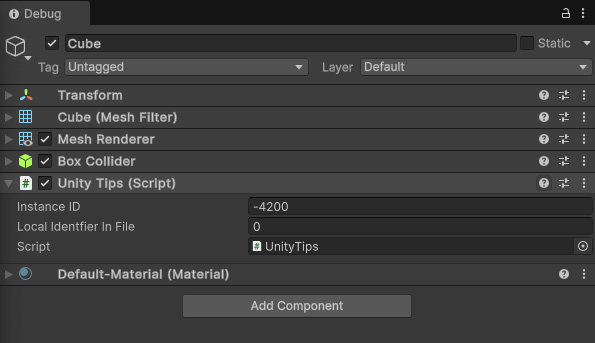
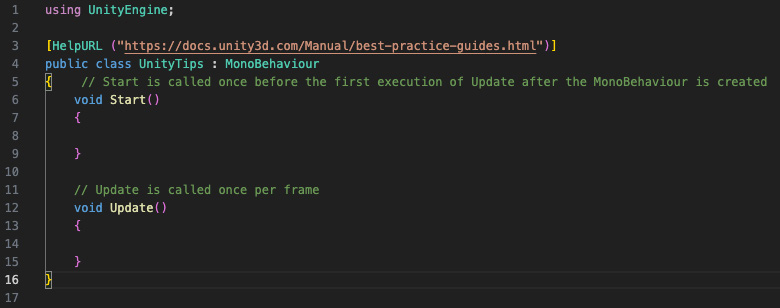
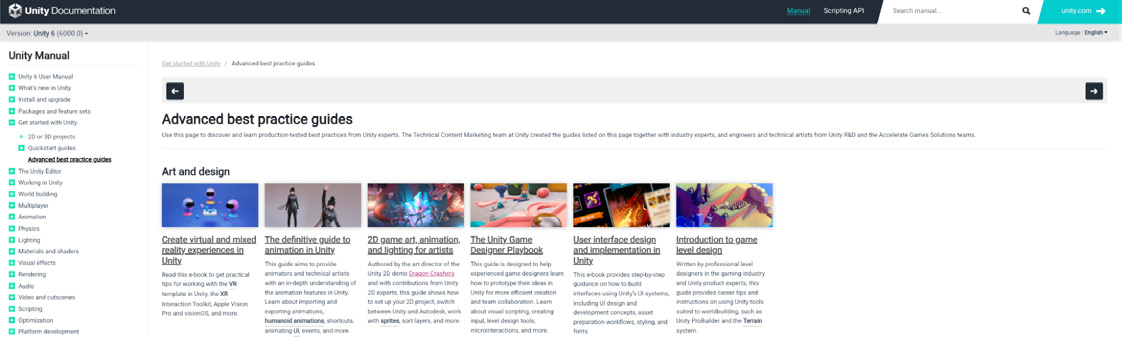
Use the [HelpURL] attribute to link the question mark icon in your Inspector to your documentation or other resources. When clicked from the Inspector it will open the specified URL in the user’s default browser.
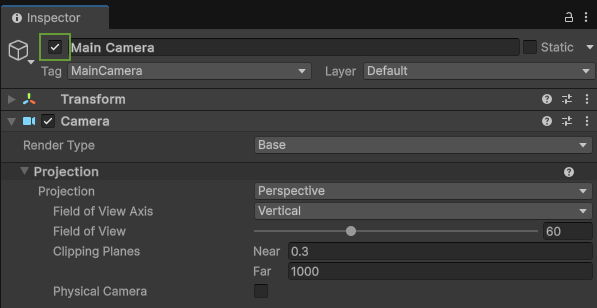
Save a few mouse clicks each day. Hold Shift + Alt + A (Windows) or Shift + Option + A (macOS) to activate or deactivate the currently selected GameObject.
Activate or deactivate the selected GameObject.
Unity allows you to customize the numbering scheme of GameObjects. Find it in the Project Settings in the Editor tab. Define the options for the naming here as well as the padding and spacing of the instance number.
Numbering Scheme
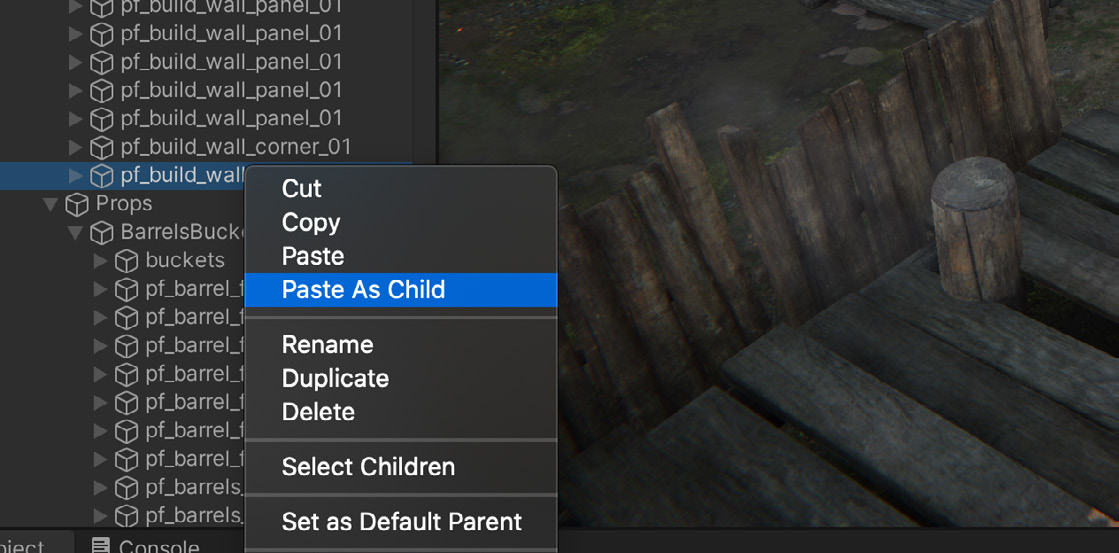
Cut and paste GameObjects in the Hierarchy window. You can also Paste As Child from the context menu.
Paste As Child
Use the F shortcut to frame the selected object in Scene view. In Play mode, press Shift + F to lock onto a selected GameObject that is moving.
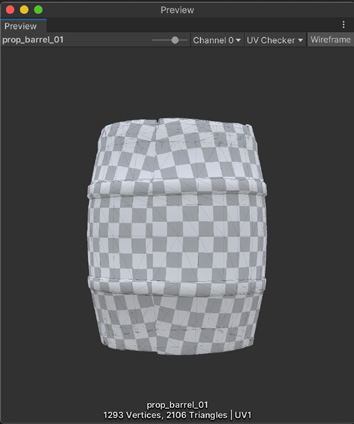
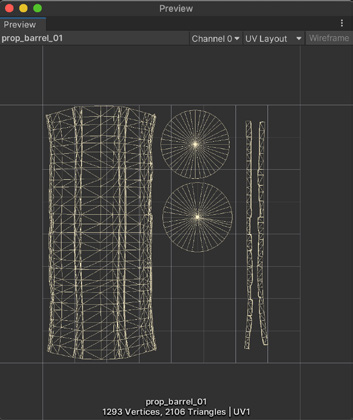
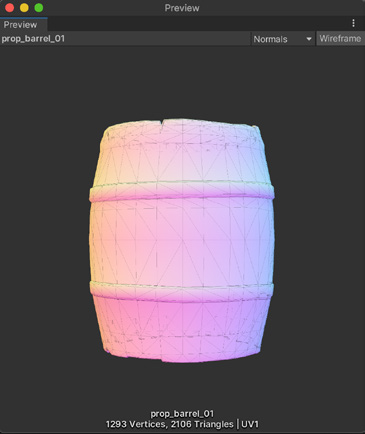
Display UVs, normals, tangents, and other Mesh information in the Inspector preview.
The Inspector preview
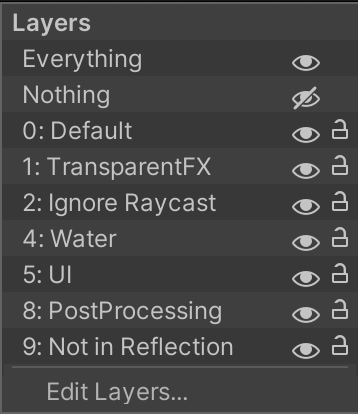
Use the Layers menu to toggle off the visibility of any Layers (such as UI) that may obscure your Scene view. Lock a Layer to avoid changing its state accidentally.
Toggle and edit Layers
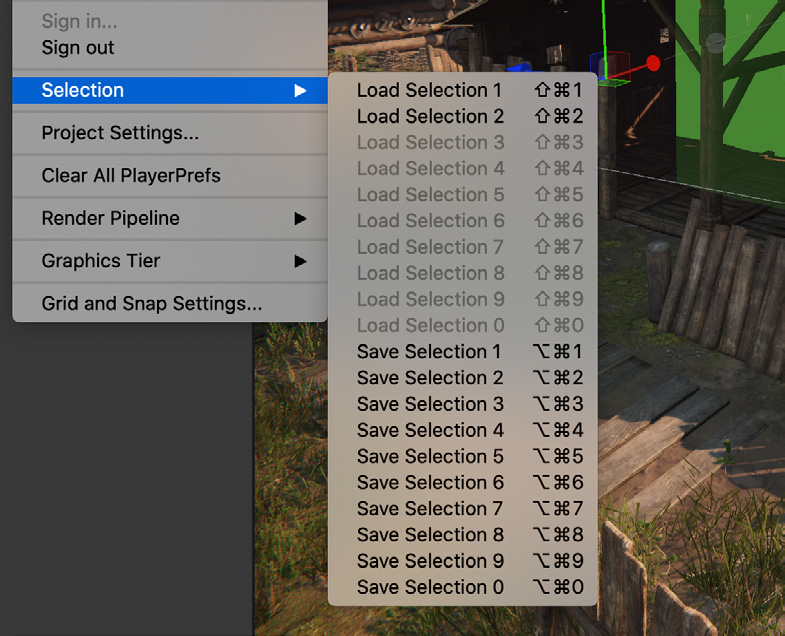
If you frequently select the same objects in your scene, use the hotkey combos under Edit > Selection to quickly save or load a selection set.
Load and Save Selections
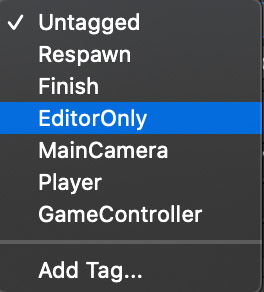
Use the EditorOnly tag to designate GameObjects that will not appear in a build of the application.
EditorOnly tag
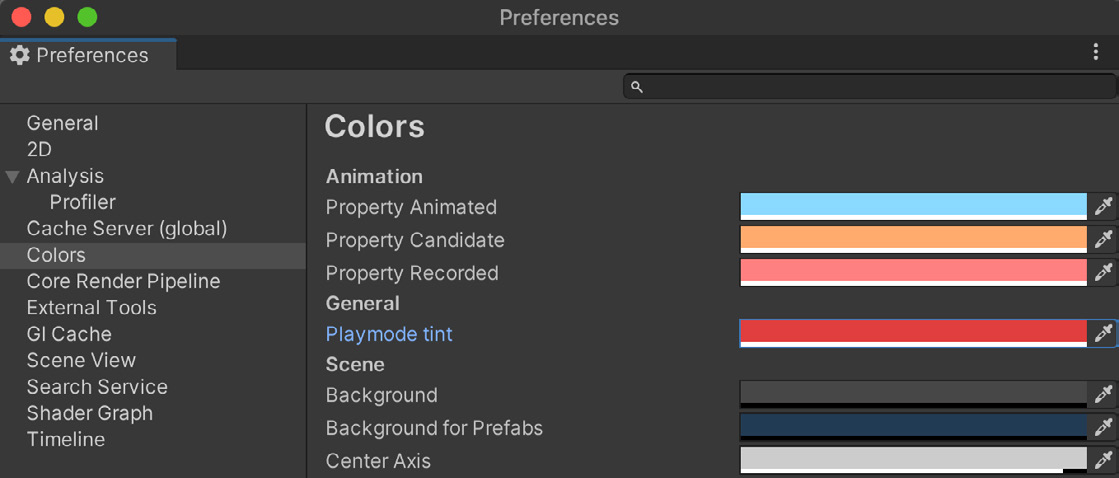
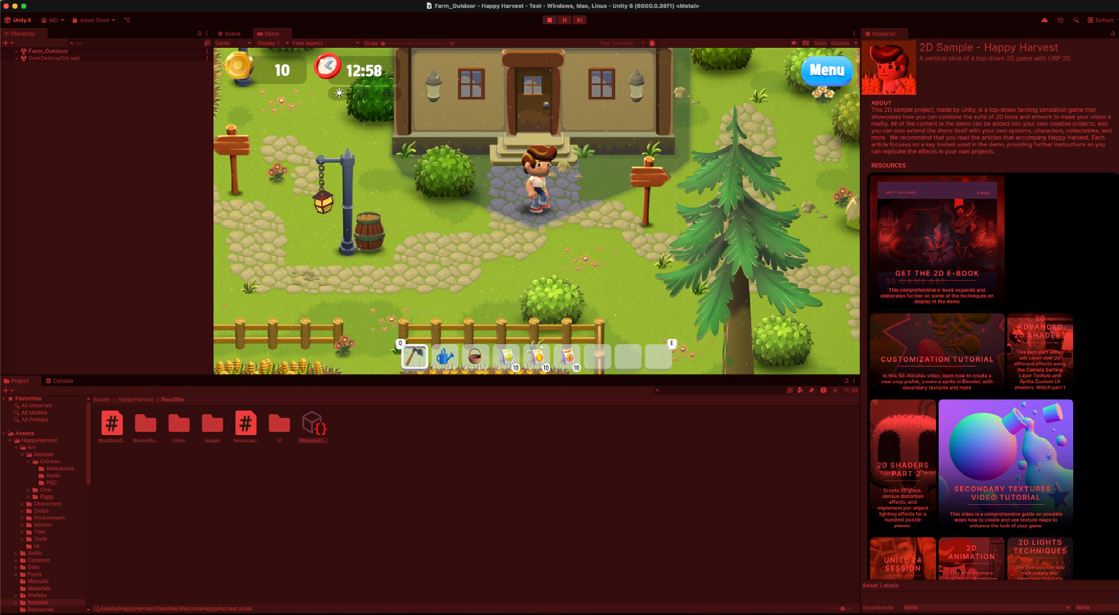
10. Change colors in the Editor via Unity > Preferences > Colors to find certain UI elements or objects more quickly. Adjust the Play mode tint to remind yourself when Play mode is active, so you don’t lose any changes you intended to save on exit.
Play mode tint
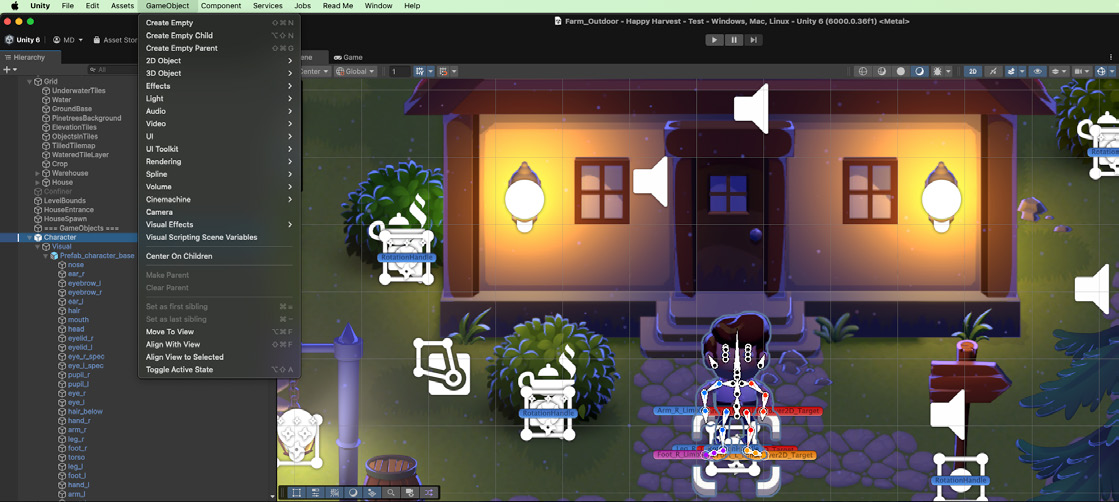
11. When you set up cameras, use GameObject > Align With View to line up your Game camera with the Scene camera. Or, if you’re matching the other way around, use Align View to Selected to align the Scene camera with another camera in the Hierarchy.
Align With View option
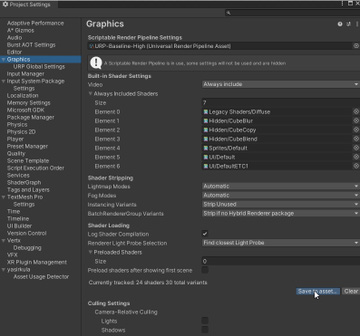
12. You can generate a list of shader variants that the Editor uses in the Scene: Go to Edit > Project Settings > Graphics. See how many shaders and variants you have under “Shader Loading”. Select Save to asset… to create a shader variant collection asset.
Graphics window
13. Double-click any tab (Project, Scene, Game, etc.) to go full screen in the Editor.
Double-click on Scene
After double-clicking on Scene
More resources For more quick productivity tips make sure to check out the following resources: —
Speed up your workflows in Unity with these keyboard shortcuts
Scalable art assets - 6 tips for improving workflows
Top tips for scripting in Unity 2022 LTS